Author Archives: wadennis42

picture of chili

Pressure Cooker Chili with Beans

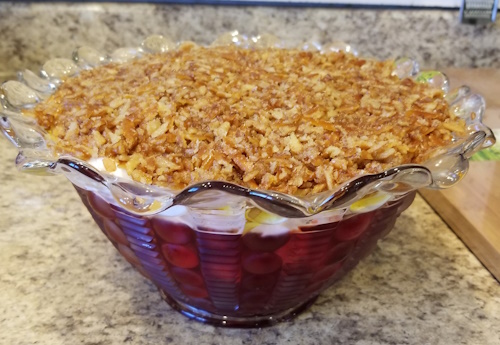
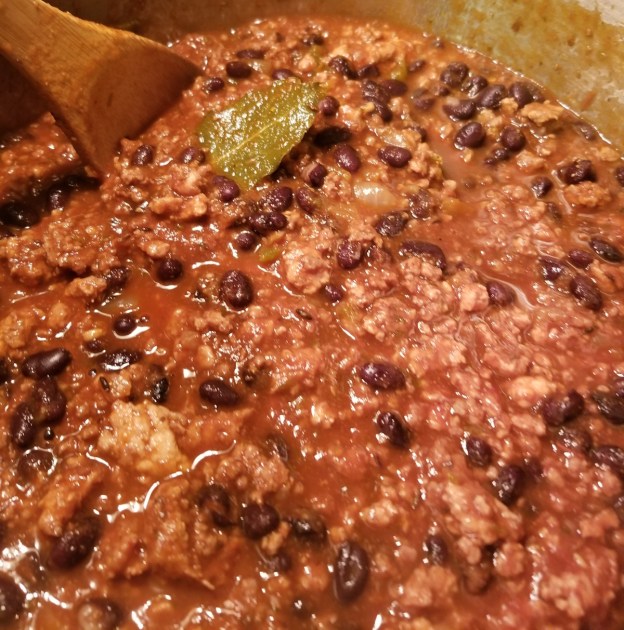
Let me get this one thing out of the way: In Texas, chili does not have beans. But there are plenty of regions where beans are acceptable, if not mandated. I use beans. Click here for a bit of history: The Great Chili Debate: Beans Or No Beans? (southernliving.com) Now for the recipe, followed by commentary. Be sure to note my special seasoning mix which will work for any recipe using 2 pounds of meat and 4 cups each sauce and beans, whether pressure-cooked, simmered stovetop or in the oven, or in a slow cooker. But you can have this ready in an hour or so via a pressure cooker.

Wendy’s Chili Spice Mix
Make this first, or better yet, make enough for several batches of chili so you will have it handy when you are in a hurry to get some chili cooking!

This mix is for a chili that has 2 pounds of meat and 4 cups each of tomato sauce and beans.

  • 3 T unsweetened cocoa powder
  • 1.5 tsp ground cumin
  • 1.5 tsp ground coriander
  • 2 tsp chili power
  • 1 tsp garlic power
  • 1 tsp chipotle powder
  • ¼ onion powder
  • ¼ tsp paprika
  • ¼ tsp cinnamon
  • 2 bay leaves

Chili ingredients:

  • 2 Tbsp olive or other oil
  • 1 Tbsp cumin seeds
  • 2 lbs ground meat (I like one each beef and turkey)
  • 2 cups chopped onion (from two smallish to medium onions)
  • 1/4 cup water
  • 1 1/2 cups chopped bell pepper (1 big pepper)*
  • 4 cups plain tomato sauce (or crushed or diced tomatoes)
  • 2 tsp dried oregano
  • 2 tsp salt
  • 1 tsp ground black pepper
  • 1 Tbsp hot sauce, or to taste. (I use Frank’s)
  • 4 cups cooked beans or 2 15 oz cans, drained and rinsed**

* If I have no fresh or frozen bell pepper, I use a few cans of mild green chilis.
** Whatever type of beans you like. I typically use pinto beans I cooked ahead of time.

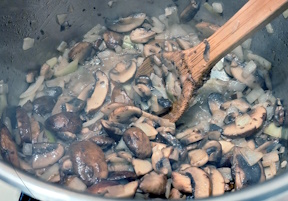
Heat the oil in the pressure cooker on medium and toast cumin seeds for 20 seconds or until pungent.

Add and break up the ground meat and cook until browned.

Stir in water and chopped onion, blend in seasoning, and stir in chopped bell pepper.

Spread the mix out evenly and gently pour the sauce or tomatoes over the top. DO NOT STIR!*

Bring to pressure and then cook for 4 minutes. Quick release (run under cold water), uncover, and return to the stovetop. Add seasonings, simmer a bit, then add the cooked or canned beans and heat through.

Enjoy!

* Here is an article explaining why tomatoes can scorch in a pressure cooker if not left on top of the rest of the ingredients: The One Ingredient That Is Probably Causing Your Instant Pot’s ‘Burn’ Message (allrecipes.com)

Quick and Easy Meatloaf

This is from my cookbook Quick and Easy, Comfort From the Kitchen, but with a change – I have found that it has an even better texture if the amounts of milk and breadcrumbs or panko is 3/4 cup each instead of 1/2 cup each. And, panko does work really well! I will be uploading a version of the book with this and other updates, so hold off on buying the book if you have not already! And, if you have purchased it already, I will put all the updates here!

Here’s the recipe. (Thanks for asking for it Eric! you’ll have to let me know how it works for you.)

  • 1 egg
  • 3/4 cup milk
  • 3/4 cup breadcrumbs or panko
  • 1/4 cup (or smore) chopped onion
  • 2 tsp Worcestershire sauce
  • 3/4 tsp Italian seasoning
  • 1 tsp dried parsley
  • 1 tsp salt
  • 1/2 tsp black pepper
  • 1 lb ground beef, lean if possible

Preheat oven to 350.

In a smallish bowl, lightly beat the egg and milk, stir in the breadcrumbs, and set aside for 5-10 minutes.

In a bigger bowl, mix the chopped onion, Worcestershire sauce, dry seasonings, and milk/egg/breadcrumb mix.

Add the ground beef and gently mix all the ingredients together. Overmixing can make your meatloaf dry and dense. You don’t want that.

Put/pat mixture into a small bread pan, a 1-quart casserole dish (I use a square Corning Ware casserole dish) or the like, or just put some parchment paper on a small tray and shape the loaf on it.

Bake for 35-40 minutes or until it reaches 160 degrees at its thickest spot.

Remove from the oven and let rest for at least 15 minutes before slicing into it.

Notes:  As with the previous recipe, this can be doubled, tripled, quadrupled, etc. Feel free to use half ground pork, too! But this one-pound size is perfect for a two-person household, with enough for each to also have a meatloaf sandwich the next day.

The Jello Side Dish

Several years ago, I had the pleasure of trying a crazy-delicious, albeit not high on the nutritionally healthy level, jello-based dish that my at-the-time rector’s Mom brought to a church luncheon. If you are from the mid-west, you know the sort of dish I am talking about. I am not, so the fact that this sugar-laden concoction was considered a side dish for the main meal was new to me!

I’ll cut to the chase: I was gifted the recipe and have made it several times for holiday gatherings. It involved Cool Whip. Yeah, not something I (or even my Mom) typically had on hand. But I now I always keep a tub in my freezer, just in case.

Before I go any further: If you make the following recipe, do NOT substitute whipped cream for the Cool Whip. It just won’t hold up.

FYI – I was inspired to create this post because my friend Cathy brought a yummy dessert to a recent gathering that had Cool Whip as one of the ingredients, although, as she pointed out, it contained yogurt as well. I need to get that recipe. The recipe I am sharing has no redeeming ingredients other than frozen raspberries. And those are laced with tons of sugar. So. …

Anyway, I was going to text the recipe with a picture of it to Cathy, but it seems my phone is doing only text and not showing pics I send along with texts to the recipients. So, to ensure the full experience, I will text the link to this post to her, instead.

Here is the recipe copied and pasted from my files. Enjoy! It is good for the soul.

Raspberry Pretzel Salad 
Courtesy of the Rev. Dr. Matthew Cadwell’s Mom
Note: In Minnesota, jello “salads” are served as side dishes with the main meal.

  • 1 – 6 oz package raspberry jello
  • 2 c. boiling water
  • 1 3/4 c. cold water
  • 12 oz frozen unsweetened raspberries 
  • 1 – 8 oz pkg regular cream cheese (softened) – not low fat or fat free
  • 1 – 8 oz original Cool Whip, thawed
  • 1 c sugar

Topping ingredients:

  • 1 1/2 c crushed pretzels (I use rolling pin to crush) – measure after crushing 
  • 3/4 c. melted butter
  • 2 T sugar

Prepare jello as usual with boiling water.  Stir until completely dissolved.  Add cold water when jello is dissolved.  Chill until partially thickened.  Fold in raspberries.  Pour into glass bowl.  Chill until almost set.  

Meanwhile, mix softened cream cheese & sugar together.  Gently fold in Cool Whip, mixing well. Spread on top of jello. 

Prepare topping by placing crushed pretzels in baking pan, pour melted butter over pretzels. Sprinkle sugar on top of pretzels & bake at 350 degrees for 8 minutes.  

Spread hot pretzel mixture over cream cheese.

image of sourdough crackers

Sourdough Discard Crackers: Crisp and “Cheesy!”

These are SOOOOOOOO good. They almost taste like cheese crackers. And the pack quite a crunch.

Along with a gazillion other people, I started playing with sourdough in March of 2020, when no one could get their hands on yeast and we were all trying to avoid going to the grocery store for things we could make at home.

For me, it was quite a silver lining. But, no story, here. Let’s get to the recipe, first. 😉 But, suffice to say, I am always looking for ways to use sourdough discard. A big thank you to Alexandra of Alexandra Cooks for the inspiration!


  • 1 cup (200 g) sourdough discard (unfed sourdough starter.*)
  • 1 cup (120 grams) whole wheat pastry flour or regular whole wheat flour
  • 1 teaspoon (3 g) kosher salt
  • 4 tablespoons (57g) unsalted butter, soft/room temperature OR, 3 Tbsp (30 grams) olive oil.
  • olive oil, for brushing (optional – I don’t do this anymore)
  • Kosher or flaky sea salt for sprinkling*

*Unfed discard is pourable versus sticky.

Preheat oven to 350 degrees Fahrenheit.

Using a wooden spoon or sturdy spatula, mix the discard, flour, salt and butter together, switching to your hands once it just starts to come together. Or, just use your hands. And, I recommend using ol; olive oil instead of butter for easier mixing. Although, butter does always taste good!

Continue mixing/quasi-kneading until the dough comes together in a ball. Add some more flour if too sticky to handle easily. A little sticky is okay, though.

Divide the dough in half, form each into a rectangle, wrap tightly in plastic wrap or a plastic or small silicon bag, and put in the fridge for at least 30 minutes or up a few days. Your can freeze it, too.

Take the dough out to warm (30 minutes on the counter if it has been in the fridge for several hours), and, one at a time, flatten onto a piece of parchment paper or, better since it won’t slide much while rolling, a silicone matt.

Roll it out as thin as you can. See the picture for guidance. It does not have to be even or pretty. It will be a bit of a workout, but worth it! You can cover the dough with plastic wrap about the same size as the silicon mat I use, which is 16.5″ x 11.6″ while rolling. (Once you make these crackers enough times, you will know the “feel” of the dough once it is just right and won’t stick to the rolling pin.)

image of the dough rolled out on the silcone mats.
These mats are each 16.5″ x 11.6″.

Once rolled out, remove the plastic if you used it, brush lightly with olive oil if doing this bit, sprinkle with salt or whatever you want as a topping, and slice to your preferred size cracker with a sharp knife.

Slide the parchment paper or silicone mat onto a cookie sheet, repeat with the other half of the dough, then pop the trays in the oven. Bake for 22-25 minutes until browning around the edges. Start checking at 20 minutes the first time since all ovens are a bit different.


I forget the last time I made these, but they will be crispier if you let them cool in the pan, but you can also cool them on a cooling rack, as well.

Then, enjoy them! They make a fun pot-luck item because people will be trying to guess what gives them the tangy taste.

mushroom onion base for soup

Crowd-pleasing Simple Mushroom Onion Soup

  • 8 oz white/button or cremini mushrooms, sliced thin
  • 3 Tbsp butter
  • 1 cup chopped onion
  • 2 Tbsp flour
  • 5 cups veggie or chicken stock
  • 1/2 tsp salt
  • 1/8 tsp pepper
  • 1/3 cup uncooked long-grain white rice
  • 1/4 tsp thyme or 1 bay leaf – or both!

Melt butter in a 3-quart or larger saucepan, add the mushrooms and onions, and cook for about 5 minutes over low heat, stirring often, until the mushrooms have released some of their liquid.

Using a whisk or wooden spoon, stir in the flour, add the stock, increase heat and, stirring, bring to a boil before adding the rice and bay leaf.

Reduce heat, cover, and simmer, checking after 15 minutes to see if the rice is tender enough for your liking. Remove the bay leaf and add additional thyme (if using), salt, and pepper if desired.

This recipe easily doubles or triples, etc. If you are preparing for a potluck or the like, doubling it will just about fill a 3.5-quart slow cooker.

I made just a few adaptations but appreciate the original recipe that you can find at Taste of Home. You can find it here: https://www.tasteofhome.com/recipes/mushroom-onion-soup/

picture of tortillas on cooling racks

Awesome (Mostly) Whole Wheat Tortillas

I started making tortillas after finding Gemma’ of ‘s recipe on her Bigger Bolder Baking food blog that used a mix of whole wheat tempered with some white flour. They are, as she says, a bit “rustic,” and I can never get them to be quite as flexible as I would like (but that’s just me) but the flavor….oh my.

You can find her recipe here: Whole Wheat Tortillas Recipe – Gemma’s Bigger Bolder Baking

After playing around, I came up with my go-to recipe for whole wheat tortillas that are flavorful but also, are less rustic and more forgiving as to cooking time as to maintaining flexibilty. Here it is, but first:

If you are making tortillas for the first time, I recommend viewing Gemma’s video, especially the part about resting the dough and rolling it out. Just go to her recipe, linked above, and “Jump” to the video. The “rest and roll” part starts at around 4:55 into the video.

Mostly Whole Wheat Tortillas

  • 1 cup (14 g) whole wheat flour
  • 1 1/2 cups (213g) whole wheat pastry flour
  • 1 cup (142g) all-purpose flour
  • 1 teaspoon baking powder
  • 1 teaspoon salt
  • 1/4 cup vegetable or other oil
  • 1 1/4 cup warm water, separated

Mix the flours, baking powder, and salt together with a fork or whisk in a big bowl.

Drizzle the oil into the flour mix and, with your hands, rub to oil into the flour until you have a crumbly mixture that looks like butter cut into flour.

Slowly pour 3/4 cup of the water in and, again with your hands, mix and knead until the water is incorporated in and the dough is smooth. You will most likely need to add some or all of the remaining 1/2 cup of water to acheive a smoot ball of dough. If you add all the water and it makes the dough too wet, add a bit of flour until the dough does not stick to the bowl and has a very slight spring to it when you poke it with your finger.

Cut the dough into six pieces for 10″ tortillas, eight pieces for 8″ tortillas, and ten pieces for 6″ tortillas.

Note: The diameter measurements are approximate, especially if you measure versus weigh the flour.

Form each piece into a ball, cover them all with a dish towel, and let rest for 15-20 minutes.
You can use this time to clean up, prep the rolling/cooking area, and heat the pan.

About 10 minutes into the resting period, put your cast iron, thick-bottomed stainless steel, or nonstick frying pan on medium to medium/high heat so it will be hot once you are ready to roll and cook the tortillas.

Once the pan is hot (drops of water will sizzle) start the process of rolling out a ball of dough one at a time, each as the previous one is cooking.

Roll a ball of dough, moving it around, to the desired diameter and carefully place it into the hot pan. Lete it cook for a minute or more until you see some puffing on the top and the bottom side is turning a golden brown.

Flip the tortilla with tongs or a spatula and continue cooking until the second side is getting browned. Lift it out of the pan and place in a pile on a towel folded to also cover so they all steam a bit after cooking.

Be sure to start rolling the next tortilla once you have one in the pan or you will be there twice as long!

Once all are done, either keep them warm for immediate use, or cool on racks and store in a plastic bag at room temperature for a day or two or just put in a freezer bag and keep frozen until using. 30 seconds in the microwave will be enough to defrost at least two at a time, or place on at a time in a warm pan to defrost and soften.

Chicken Stock Under Pressure – the best!

While I opt to poach boneless skinless chicken breasts on the stove top,* I always use a pressure cooker when I have a whole chicken to work with. Just follow my directions and you will end up with close to two quarts of delicious chicken stock and enough chicken meat for at least 2-3 meals.

The following recipe is for a four to five-pound chicken. A four-and-a-half-pound chicken will give you at least 7 cups of stock and 20 ounces of succulent meat.

Use a 6-quart or larger pressure cooker or Instant Pot. For the latter, follow the manufacturer’s instructions and set for high pressure.

Note: You can use more water for more stock, especially if you go with a chicken over 5 pounds, but for 5 pounds or under, 6 cups works with no risk of needing to cook it down to increase the flavor.

Here is the recipe:

  • 4-5 pound chicken
  • 1 stalk celery, sliced very thin
  • 1 carrot sliced very thin
  • 1 small onion sliced very thin
  • 1-2 bay leave depending on size of bay leaves
  • A few or more sprigs of thyme and/or other fresh herbs 
    OR
  • A teaspoon or so of one or more dried herbs such as thyme, marjoram, or oregano – and parsley is always good.
  • ¼ tsp whole peppercorns
  • 1/8 tsp or so cumin power, if desired. It adds just a little “something.”
  • 1 tsp salt unless you want salt free.
  • 6 cups water cups

Drain out any fluids from your whole chicken and place in the pressure cooker, including neck and offal if included, but not the liver – it can impart a bitter flavor and will get too tough to eat.  

(If you like liver, reserve it and coat it in a bit of flour with salt and pepper and fry it up for yourself while your pressure cooker does its thing.)

Put everything in the pressure cooker, be sure it is properly sealed, and put on a medium/high burner until it comes to pressure. This takes 15-20 minutes.

 Reduced heat to medium-low or just enough to keep at pressure and let it cook for 20 minutes.

Remove from heat and let the pressure release naturally. This takes about 15-20 minutes.

Open the pressure cooker and use tongs to lift the meat out into a big bowl or dish and let cool a bit before picking the meat off the bones for later use.

Don’t worry if you don’t get all the meat if you are going to do round two, below. I just do what is easy the first round since any meat left on the bones will give flavor to the second bout of pressure cooking; and after that, will come off the bones more easily.

Strain all the stocks through a fine sieve strainer, including the juices that settle in the bowl where you cool and pick the meat off the bones. Reserve for later use.

Note: You could be done here, but there’s more to do if you want more stock. You need to do the next step if you want 7 cups of stock, otherwise you’ll only get about 3 1/2 cups.

Also, you can put it in the fridge or freezer to pressure cook up at a later time.

NEXT: Take ALL the bones, veggies, and herb scraps, and any meat still left on the bone – leave as much as you want!) and run it through the pressure cooker again with 4 cups of water for 20 minutes.

Natural release again, strain, and discard the twice-used scraps.

You can use this second batch of stock separately – maybe add more seasonings the second time round, or just add it to the first batch of stock.

You will end up with lovely tender meat and lots of tasty homemade stock.

Enjoy!

* If you want to poach boneless skinless chicken breast, I recommend Poached Chicken – Juicy, guaranteed! by Nagi of RecipeTin Eats.

pan seared swordfish

Pan-seared swordfish with lemon butter caper sauce — Easy!

So easy! So delicious! So quick! Use this recipe for a quick meal or as part of a company meal menu. And, while you could leave out the capers in a pinch, or if you don’t like them, I think they put this recipe over the top.

• 2 swordfish steaks, each about 1 inch thick
• 2 lemons, juiced (4-5 Tablespoons or more for more sauce)
• zest from one lemon
• 1 tbsp. capers
• ½ tbsp. butter
• 2 tbsp. cold butter
• ½ small bunch flat-leaf parsley, finely chopped (optional)
• sea salt
• black pepper

In a small bowl, crush capers with the back of a spoon. (Or just use your fingers!)

In a small pan over medium heat, melt ½ tbsp butter until just gold. Add capers and sauté until fragrant. Add lemon juice and zest, bringing to a simmer and continuing to cook until liquid is reduced by 1/3. Season to taste with salt and pepper, remove from heat.

Add cold butter into lemon mixture, stirring constantly until butter is completely melted, about 1 minute. Set aside.

Heat a 12-inch skillet over medium-high heat.* Lightly season steaks with salt and pepper, then place in pan and cook on one side 2-3 minutes. Flip steaks and add the sauce, cooking another 3 minutes on the other side.

Plate steaks, drizzling remaining sauce over each. If desired, sprinkle parsley over steaks.

* NOTE: The swordfish is put directly on the pan with no oil. I thought the recipe left out oiling the pan by mistake, but nope. Just put the swordfish right on the dry, preheated pan.

To accompany, steamed vegetables are a nice, simple foil to the rich swordfish and tangy sauce. While roasted, fried, or air-fried potatoes go nicely, farro, with its nutty flavor and chewy flavor, is an excellent match as well. I typically use semi-pearled so it retains so wholegrain benefits but cooks in a short time.

finely chopped cabbage

Ground Beef and Cabbage – So easy and so delicious!

This is a great one-dish meal – just add some good bread to soak up the juices or serve over rice or pasta. Plus, it offers the perfect way to get nutrient-rich cabbage into your meal routine.

To watch my cooking demo video for this recipe, Click HERE. And, please do consider subscribing. Thank you!

Here is the URL for the original recipe on which my variations are based. It is super as is!

https://www.allrecipes.com/recipe/229324/ground-beef-and-cabbage/

Here is my latest take:

  • 2 Tablespoons butter
  • 1 onion, halved and thinly sliced
  • 2-3 cloves garlic or to taste, minced
  • 1 pound or so of finely chopped cabbage
  • 5-6 oz (or more) grated or thinly sliced/chopped carrot
  • 2 (14.5 ounce) cans diced tomatoes with juice
  • 1 tablespoon Italian seasoning (I use Penzys)
  • 1 teaspoon salt and ground black pepper to taste
  • Smoked garlic salt (optional)
  • Sharp paprika
  • Turkish or regular oregano
  • 1 pound lean ground beef

Sauté onions in butter until starting to get soft. Add garlic and cook for 30 seconds or until fragrant.

Add cabbage and carrot, mix a bit, add tomatoes with juice, Italian seasoning, salt, and black pepper in a large pot over low heat. Bring cabbage mixture to a simmer and cook down a bit.

Crumble ground beef into the pot. Cover and cook until cabbage is tender and ground beef is cooked through and the texture is to your liking, stirring occasionally. Start checking after 35 minutes after covering.

Check seasoning and adjust as/if needed. Cook down if still more “liquidy” or crunchy for your taste.

* You can play with the seasonings. For my most recent version, along with Italian seasoning (I used Penzeys brand, but any blend will do) I added some smoked garlic salt, oregano, paprika, and a good dose of grated parmesan cheese.  Have fun creating your own special version. E.g. add beets and caraway seeds for an Eastern European take, or corn kernels, jalapeno and cilantro for a Mexican flair.  Or just stick to the basics – it’s all good!

Chick Peas with Chorizo Sausage – less meat, more veggies!

Do you sometimes wonder what to do with the produce in your fridge and and all sorts of things in your freezer? While I am presenting this as a recipe as I made it, I encourage you to use the basic technique (saute onion and any sausage (or any uncooked meat) to build a flavor base, add greens and other veggies, then legumes and canned or fresh tomato, cook and then serve over rice or pasta. Or put the rice or pasta in it and for a stew, add some more liquid. As to seasonings? That it up to you!

But, here is what I did when videoing the cooking demo that you can see by clicking HERE.

  • 1-2 tablespoons olive or as needed
  • 1/2 a medium onion (3.5-4 ounces) chopped
  • 2 cloves garlic, or more to taste, minced
  • 1/3 pound (5-6 ounces) fresh chorizo sausage, slice think and quartered
  • 1/4 pound or so thinly sliced Hakurei turnip
  • 1/4-1/4 pound (I used 6 ounces) chopped kousa squash
  • 1 Bishop’s Crown pepper, de-seed and chopped (but I wish I had used at least three!)
  • 1/4 pound (3.5-4 ounces) rinsed and chopped turnip greens
  • 10 ounces (3/4 pound or a bit under) cooked chick peas/garbanzo beans
  • 1 cup corn kernels, fresh, frozen, cooked or raw
  • 1 cup chicken broth
  • 1 14.5 ounce can of diced tomatoes or 3-4 fresh tomatoes, chopped small/diced small.
  • salt, pepper, and hot sauce to taste

I will add the instructions later, but for now, watch the video by clicking HERE. And, please consider subscribing to my blog via the link to the top right and subscribing to my YouTube channel. Thanks! 🙂