Category Archives: Beef

picture of chili

Pressure Cooker Chili with Beans

Let me get this one thing out of the way: In Texas, chili does not have beans. But there are plenty of regions where beans are acceptable, if not mandated. I use beans. Click here for a bit of history: The Great Chili Debate: Beans Or No Beans? (southernliving.com) Now for the recipe, followed by commentary. Be sure to note my special seasoning mix which will work for any recipe using 2 pounds of meat and 4 cups each sauce and beans, whether pressure-cooked, simmered stovetop or in the oven, or in a slow cooker. But you can have this ready in an hour or so via a pressure cooker.

Wendy’s Chili Spice Mix
Make this first, or better yet, make enough for several batches of chili so you will have it handy when you are in a hurry to get some chili cooking!

This mix is for a chili that has 2 pounds of meat and 4 cups each of tomato sauce and beans.

  • 3 T unsweetened cocoa powder
  • 1.5 tsp ground cumin
  • 1.5 tsp ground coriander
  • 2 tsp chili power
  • 1 tsp garlic power
  • 1 tsp chipotle powder
  • ¼ onion powder
  • ¼ tsp paprika
  • ¼ tsp cinnamon
  • 2 bay leaves

Chili ingredients:

  • 2 Tbsp olive or other oil
  • 1 Tbsp cumin seeds
  • 2 lbs ground meat (I like one each beef and turkey)
  • 2 cups chopped onion (from two smallish to medium onions)
  • 1/4 cup water
  • 1 1/2 cups chopped bell pepper (1 big pepper)*
  • 4 cups plain tomato sauce (or crushed or diced tomatoes)
  • 2 tsp dried oregano
  • 2 tsp salt
  • 1 tsp ground black pepper
  • 1 Tbsp hot sauce, or to taste. (I use Frank’s)
  • 4 cups cooked beans or 2 15 oz cans, drained and rinsed**

* If I have no fresh or frozen bell pepper, I use a few cans of mild green chilis.
** Whatever type of beans you like. I typically use pinto beans I cooked ahead of time.

Heat the oil in the pressure cooker on medium and toast cumin seeds for 20 seconds or until pungent.

Add and break up the ground meat and cook until browned.

Stir in water and chopped onion, blend in seasoning, and stir in chopped bell pepper.

Spread the mix out evenly and gently pour the sauce or tomatoes over the top. DO NOT STIR!*

Bring to pressure and then cook for 4 minutes. Quick release (run under cold water), uncover, and return to the stovetop. Add seasonings, simmer a bit, then add the cooked or canned beans and heat through.

Enjoy!

* Here is an article explaining why tomatoes can scorch in a pressure cooker if not left on top of the rest of the ingredients: The One Ingredient That Is Probably Causing Your Instant Pot’s ‘Burn’ Message (allrecipes.com)

finely chopped cabbage

Ground Beef and Cabbage – So easy and so delicious!

This is a great one-dish meal – just add some good bread to soak up the juices or serve over rice or pasta. Plus, it offers the perfect way to get nutrient-rich cabbage into your meal routine.

To watch my cooking demo video for this recipe, Click HERE. And, please do consider subscribing. Thank you!

Here is the URL for the original recipe on which my variations are based. It is super as is!

https://www.allrecipes.com/recipe/229324/ground-beef-and-cabbage/

Here is my latest take:

  • 2 Tablespoons butter
  • 1 onion, halved and thinly sliced
  • 2-3 cloves garlic or to taste, minced
  • 1 pound or so of finely chopped cabbage
  • 5-6 oz (or more) grated or thinly sliced/chopped carrot
  • 2 (14.5 ounce) cans diced tomatoes with juice
  • 1 tablespoon Italian seasoning (I use Penzys)
  • 1 teaspoon salt and ground black pepper to taste
  • Smoked garlic salt (optional)
  • Sharp paprika
  • Turkish or regular oregano
  • 1 pound lean ground beef

Sauté onions in butter until starting to get soft. Add garlic and cook for 30 seconds or until fragrant.

Add cabbage and carrot, mix a bit, add tomatoes with juice, Italian seasoning, salt, and black pepper in a large pot over low heat. Bring cabbage mixture to a simmer and cook down a bit.

Crumble ground beef into the pot. Cover and cook until cabbage is tender and ground beef is cooked through and the texture is to your liking, stirring occasionally. Start checking after 35 minutes after covering.

Check seasoning and adjust as/if needed. Cook down if still more “liquidy” or crunchy for your taste.

* You can play with the seasonings. For my most recent version, along with Italian seasoning (I used Penzeys brand, but any blend will do) I added some smoked garlic salt, oregano, paprika, and a good dose of grated parmesan cheese.  Have fun creating your own special version. E.g. add beets and caraway seeds for an Eastern European take, or corn kernels, jalapeno and cilantro for a Mexican flair.  Or just stick to the basics – it’s all good!

Simple Blended Burger: Bursting with Flavor and Crunch!

I came up with this recipe for the #BlendedBurgerContest of the Blended Burger Project sponsored by Bon Appétit and the Mushroom Council. While the recipe doesn’t include sourcing specifics, and, as submitted called for ingredients you can find at any grocery store, I did use all locally sourced foods from Wakefield Farmers Market (MA) farmers during my test process.

I used ground beef from Lilac Hedge Farm, the cabbage, carrots, and onions from Farmer Dave’s, and I did a test using tatsoi from Farmer Dave’s instead of regular cabbage (really great taste!) and also did a run with some wonderful shitake mushrooms from Fat Moon Mushrooms, (and would have used West River Creamery’s Cambridge Cheddar if I had not run out!)

Check out this great way to get lots of veggies into your burger!

You can watch my cooking demo by clicking HERE.


Ingredients:

Beef-Mushroom Patties with Cabbage and Carrot:

8 oz fresh white button mushrooms, diced
2 tablespoon olive or other oil, divided or just 1 tablespoon if grilling
2 ounces (1/2 cup packed) finely chopped cabbage
1 ounce (1/4 cup packed) carrot, grated then chopped a bit
1 ounce (1/4 cup somewhat packed) minced onion
1/4 teaspoon salt
1/4 teaspoon ground black pepper
1 pound 85% lean ground beef
6 ounces sliced sharp cheddar cheese, about 1.5 ounce per patty

Coleslaw:

6 ounces thinly sliced and chopped cabbage
1 ounce grated carrot
1/4 cup (2 oz) mayonnaise
1 tablespoon white sugar
3/4 tablespoon lemon juice
1/2 tablespoon vinegar
1/8 teaspoon salt, or to taste
1/8 teaspoon ground black pepper, or to taste
1/8 heaping teaspoon poppy seeds (optional)

To Serve:

4 good quality buns, toasted
1 or 2 tomatoes, sliced
1/3 cup coleslaw on each burger (and more on the side if desired)
ketchup (optional)

Method:

Dry roast mushrooms: Heat a medium size frying pan over medium heat, add the diced mushrooms, and cook for 10 minutes or until reduced and getting dry, stirring and scraping pan as necessary.

Remove mushrooms from pan, add one tablespoon oil, let heat for a minute or so and then add the mix of cabbage, carrot, and onion. Cook for about 7 minutes over medium heat until tender.

Add cooked mushrooms back to pan, add salt and pepper, and stir while cooking for a minute or two to mix and release a bit more liquid.

Let mushroom veggie mix cool for at least 5 minutes, then mix into the ground beef.

Form four patties, flattening each to just over 1” or so. Be sure to smooth the edges.

Add the remaining tablespoon of oil to the same or a clean frying pan and cook over medium-high heat 5-7 minutes to get a nice crust on one side, flip, cook for 2-3 minutes, then add cheese to melt while the second side finishes to a nice crust. These also cook well on the grill.

Be sure to toast the buns while the burgers are cooking.

To make coleslaw, mixed together the sliced/chopped cabbage and grated carrot. In a medium size bowl, whisk together the dressing ingredients, then mix in the cabbage and carrots.

Once done, place burgers on bottom bun, and top burger with about 1/3 cup coleslaw, a few slices of tomato, and, if using, ketchup. Cover with the top of bun and enjoy!

Time Saver Tips: It will use an extra pan, but you can simultaneously cook the mushrooms in one pan and the veggie mix in another. Also, the coleslaw can be made while the mushrooms and veggies are on the stove, or while the burgers cook. Of course, you can also use your favorite pre-made coleslaw or a package of shredded cabbage and carrot to speed things along. Cooking the mushrooms in with the veggies is not recommended as the mixture will not hold together well and result in “burger bites” rather than whole patties.

Cooking In Season: This recipe calls for white button mushrooms and regular cabbage, along with carrot and onion, because they are available to most people in the USA year-round. However, for those who like to shop in season with their local farmers, the burger recipe was tested with tatsoi, available in abundance during the early summer, replacing the cabbage with 3 ounces instead of 2 for the burger mix. Just be sure to cook down well due to the extra moisture content. Tatsoi adds a unique and tasty flavor punch, as do different types of mushrooms.

Make Ahead: Once formed, you can cook right away or store the burgers in the fridge for up to three days or in the freezer for a few weeks. No need to defrost the latter before cooking. Freezing does soften the flavor and texture’s wow-factor a bit, but with the toppings, you’ll still get a great burger. On the plus side, if you serve with just ketchup to the veggie-wary; they just may not notice all the good-for-you ingredients IN the burger.

Fun Flavor Tip: For a bit of that “fast food burger with special sauce” effect, top either a fresh or previously frozen burger with a modest amount of coleslaw and a good dose of ketchup.
However you do it, you’ll be getting an extra nutritional bang for your burger.

Frozen Steak? Just Grill or Pan Sauté It. Really! No Need to Defrost.

This steak was not defrosted before it was grilled.

Not only can you grill (or pan saute) steak when frozen, many recommend it. I will update this post with references, but, for now, based on repeated experience as grilled by my husband Steve, here are the instructions for grilling frozen steak:

Heat the grill to high. Put the totally frozen steak over direct heat and grill for 5 minutes.

Flip, baste*, and grill for another five minutes. Lower heat and flip steak one more time, this time moving it up away from direct heat.

Baste one more time, and let the steak “roast” with the grill lid down, keeping the temperature at 350-375.

Use an instant read thermometer to monitor the internal temperature, checking every 5 minutes or so. Remove when at desired temperature and let rest at least 5 minutes per inch thickness. The attached picture shows steak done this way to 135 and then rested 5-7 minutes before slicing.

*For basting, we melt about a tablespoon of butter per steak. Once hot, we stir in 3/4 tablespoon  or so to a tablespoon of butter of Bondat Food’s Chocolate Chipotle Grilling Rub.

IMPORTANT: Keep a close eye to make sure the attached or dripping fat doesn’t catch fire and cause charring.

If grilling in cold weather, keep the lid down during the initial grilling to maintain high heat.

NOTE: This technique can be used inside using a heavy frying pan for the high heat part and the oven for the finishing roast period.

Steak – Definitely Not Just for Grilling!

My husband would have never agreed with the title of this post before trying steak prepared via a simple stove-top technique presented by Chef Tiffani Faison on NECN earlier this week.

Although we tune into NECN mostly for the weather (we are big Matt Noyes fans), we caught Chef Tiffani’s Valentine Dinner segment and decided to try it for ourselves, albeit putting our celebratory meal off to Friday night. You can see the video, recipe, and the chef’s extra tips by clicking HERE.

I had hoped to get some locally raised beef for this meal, but was not able to get to the Medford Winter Farmers Market on Thursday, so I opted for two strip steaks from Farmland, our local grocery store. [Note to self: talk to Frank about offering locally raised meats at Farmland!]

seasoned steak

This photo is deceptive – these are 2″ thick – although the one on the right was a bit thinner (1 1/2″) on one end.

For this recipe, all you need is:

  • strip steak(s) or comparable cut
  • freshly ground black pepper
  • kosher salt
  • high quality olive oil
  • garlic cloves
  • fresh sprigs of thyme
  • butter – REAL butter!

Other than that – you need to have a really good pan.  Chef Tiffani recommends cast iron, but any pan with a thick bottom that spreads and hold heat evenly will work just as well.  How do I know? I’ll tell you.  🙂

I had two steaks, but only one of my well-seasoned cast iron pans is big enough  for one steak, never mind two.  But, I also have an All-Clad saute pan… Time to experiment! Good thing Steve knows his way around the kitchen.

pans ready

Dueling pans set and ready to go. 🙂

The first step was to bring the meat to room temperature by removing it from the fridge an hour or so before cooking. Then we prepped each station with a few crushed garlic cloves, a small bunch of thyme, and partially melted butter, as well as a basting spoon and tongs at each site. We put about 2 tablespoons of olive oil in each pan and were ready to go.

Steve took his place at the cast iron and and I stepped up to the All-Clad saute pan, and we were off!

Here is the technique, edited down to a few simple bullet points:

  • Season steak with pepper and LOTS of salt
  • Add 2 T oil to pan
  • Turn heat under pan to HIGH
  • When oil is HOT, (smoking is good!) put steak in the pan
  • Baste steak with the olive oil and juices for 3.5 – 4 minutes
  • Flip steak and baste for another 2 minutes
  • Turn off heat and add crushed garlic and thyme to pan
  • Add butter, put garlic and thyme on steak, and baste all with butter
  • Remove steak from pan and let rest for at least 10 minutes.

First one out!

First one out!

Note the lovely crust!  We also did as the chef suggested and used the tongs to hold the steak fat band in the oil to crisp that up, also. Holding the steak so that just the fat is in the oil is also a great way to test whether the pan is hot enough – if it gives a good strong sizzle, it is ready for the steak.

Resting

Resting for just a bit.

While the steak rested, I steamed some asparagus and finished up the potatoes…Oh, I forgot to mention the potatoes!  To accompany, I cut up five or so small red potatoes and half a big Vidalia onion, added around 10 little cremini mushrooms, and tossed them with freshly ground black pepper, kosher salt, and a tablespoon or two olive oil in a corning ware casserole. I  also had some thyme to spare…

Roasted potato, crimini mushrooms, and Vidalia onion.

Roasted potato, cremini mushrooms, and Vidalia onion.

I then covered with foil and cooked for about an hour at 400 degrees, obviously starting them well before the steak. Once the steak was done and resting, I removed the foil and kept cooking to crisp up just a bit.

And then, a lovely dinner.  This picture does not do it credit. At all.

plated

Plated – with photo taken after the start of the meal!

We could have done fine with just one steak rather than two, but we did have plenty leftover!  But, in general, one steak weighing a pound or a bit under is more than enough for two.

LOTs of leftovers.  :)

Lots of leftovers!

Bottom line, this is a really tasty way to prepare steak, as well as quick and easy.  And, here is a cleanup tip: Let the pan sit overnight and use some paper towels to wipe out the congealed fat. Then, simply wash as usual if using a stainless steel pan, or, if using cast iron, just soak for a bit in very hot water and then wipe clean.

And, which pan did the best job?  After trying some of the second steak the next day, I can say that they both produced an equally crusty and delicious steak.  So, while cast iron is the classic choice, feel free to use a stainless steel pan providing it has a heavy bottom and can handle high heat.

But, especially if preparing a special meal to share with your honey, I recommend the pan contest, or a least work together to create the entire meal. That will add the best seasoning of all.  ❤

Bottom Round Pot Roast with Onion Gravy

I found this recipe in my “keeper” folder but, of course, could not remember much about it…except that both Steve and I must have enjoyed it, hence its place in the “keeper” folder.  Memory like a screen these days…  ANYWAY… I tried it again and am making sure to record things this time.  🙂

Here the recipe from Allrecipes.com, one of my favorite recipe sites, from which I worked: Bottom Round Roast with Onion Gravy

And, here is my take.  First of note is that this is a stove-top dish, although I am sure it would do fine in a 190 or 200 degree oven or in a slow cooker.  If I try it that way, I’ll make note of it here.  But, the nice thing about this recipe is that it CAN be make on a burner.  In fact, when I was about to make this recipe, my oven suddenly defaulted into Sabbath mode and only the burners were working…Thankfully I was able to reset things, but the good news is that I could still have made this dish if the the oven had remained out of order!

But, I digress.  So, here is my take on this dish:

  • 3 or so cups of sliced onions.  (see picture for amount)
  • 2 or 3 cloves of garlic, minced
  • bottom round roast (I used one almost 3 pounds)
  • salt, pepper, dried rosemary to season roast before browning
  • a sprig or two each fresh rosemary and thyme
  • 1/2 cup Merlot
  • 1 bay leaf
  • 1 tablespoon vinegar (I used cider)

After cooking the roast

  • another 1/2 cup Merlot
  • 3/4 cup beef broth
  • 1/2 teaspoon each dried thyme and rosemary
  • 1 cup chopped fresh mushrooms
  • 1 tablespoon flour, if needed to thicken

First, I sliced up the onion and minced the garlic.

onions

I used two BIG onions, but in general, one onion makes about a cup, chopped or sliced.

The original recipe was intended as a very easy prep dish, and the reviews indicate that it all tasted great without browning the meat first. But, I wanted to add some extra flavor, so I started off by browning the roast in my dutch oven after seasoning with freshly ground pepper, kosher salt, and crumbled dried rosemary.

I then removed the roast and put the onions, garlic, fresh rosemary and thyme, and Merlot in the pan, turned up the heat, and deglazed the pan, scraping up the brown bits.

deglazing

deglazing with the Merlot and herbs

Next, keeping things simmering, I added the bay leaf,  and sprinkled in the vinegar before placing the browned roast, with the layer of fat up, on the onions.

ready to cook

Ready to cover and cook!

I then covered and cooked for three or so hours.  I used a heat diffuser to make sure nothing burned, but it probably would have been fine without one. But do make sure you use a heavy pot! I kept the burner on low and made sure that I heard just a little bit of sound when I put my ear really close so I knew it was at a low simmer, but didn’t let it stay hot enough to cause substantial steam to be released from under the cover. Basically, you want the temperature to stay under a boil, and preferably around or under 200 degrees. AND, don’t lift the cover until you think the roast is done!

cooked!

And here it is when first uncovered.

My next step was to remove the roast and tent with foil on the cutting board while I finished the gravy, starting by adding the other 1/2 cup of Merlot and simmering until the liquid was reduced by about half.

reduced onions

Look at those onions! Just gorgeous.

I then added the 3/4 cup beef stock (I actually used veal stock, but that is another story!) and the 1/2 teaspoon each of dried thyme and rosemary, and cooked it down a bit further.

with the Merlot

I took this shot because I wanted to emphasize that a good wine is preferable to a red “cooking” wine, and a nice Merlot is the best choice for enhancing the flavor of the dish, as well as the enjoyment of the cooking process. 🙂  Also, I’d like to note that the wine glass in the picture is the last of the set of four that my best friend Linda gave me years ago. ❤

Next, I added the mushrooms.

adding the mushrooms

Adding the mushrooms to the further reduced gravy.

To be honest, I don’t remember if I added any flour to thicken.  Based on my handwritten notes, I don’t think I did.  But, it is always an option if you want to thicken the gravy.

gravy done!

Thick enough!

The final steps: carve the meat, add to the gravy, and plate!

This was a really great recipe.  And truly, using a good red wine was key to it being exceptional.  To end this post, I served the beef with roasted potatoes (chop as shown, sprinkle with seasonings of choice (include rosemary for this menu) and olive oil, and roast at 425 for 45 or so minutes or until done) and steamed broccoli and carrots, as shown. Just lovely.

So easy, and leftovers are even better!  Enjoy!

Cajun Roast with Maque Choux – Wonderful Beef Chuck Recipe

I found a small chuck roast on sale – but really didn’t want to do the typical pot roast or beef stew thing.  What to do?  Well, I found a recipe with a spicy Cajun flavor and just had to try it.

Here is the link to the recipe I found online:  Cajun Roast with Maque Choux. See this link for an explanation of Maque Choux.

I have also copied the recipe here, followed by my comments and photographs.

**************************************

Cajun Roast with Maque Choux

Makes 6 servings

Ingredients:
1 (2 to 2-1/2 lb.) boneless beef chuck roast
1 Tbsp. dried Cajun seasoning
1 (9-oz.) pkg. frozen corn
1 small onion, chopped
½ green pepper, chopped
1 (14.5-oz.) can diced tomatoes, undrained
1/8 tsp. pepper
½ tsp. salt
½ tsp. hot sauce
Cayenne pepper, to taste

Preparation:
Rub entire surface of beef roast with Cajun seasoning. Place roast in a large slow cooker. Top with corn, onion and green pepper. In a small bowl, combine tomatoes, pepper, salt and hot sauce; mix well. Pour over vegetables and roast. Cover and cook on low for 8-10 hours. To serve: Cut roast into slices and serve corn mixture with a slotted spoon.

************************************

This recipe was REALLY quick and easy to prepare.  Here is a shot of all the ingredients except for the pinch of cayenne.  By the way, I might add either another teaspoon of hot sauce or a a few extra pinches of cayenne next time.  Although, I had better wait to see how spicy it is the 2nd day around.

All the ingredients - except for the cayenne

I just love the way  raw ingredients look in a picture.  According to one definition of alchemy, cooking is indeed of that art.  From the Webster Online Dictionary definition of alchemy: 2 : a power or process of transforming something common into something special.

Speaking of something special, I really like the Sriracha Hot Sauce that I used in this recipe.  I think I saw it recommended in Bon Appetit.  See my Recommended Kitchen Things page.

With the rub on the beef

You maybe have noticed that I actually used a seasoning blend called “blackened creole blend” by Frontier Co-op, rather than Creole seasoning. See my Recommended Kitchen Things page.  From my research, opinions range from hard-core camps on both the Cajun and the Creole sides who define the two styles of cooking and seasoning as totally distinct, to folks of all levels of expertise saying that much merging has happened between the two cooking styles, or at least the types of seasoning used.  However, I want to research that further.

But for now, I can vouch for the tastiness of this recipe using the Creole blend, which is what I happened to have in my spice cabinet.

Where's the beef? (Sorry, couldn't resist...)

This really was so easy to put together.  Just chop the veggies and put them in on top of the meat….

Sauced and ready to go

…and mix the sauce ingredients and pour it over everything.  Oh, a note about the called for 1/2 a green pepper.  I had maybe 1/3 of one, but grabbed a ripened, and thus red one from the bell pepper plant that wintered over inside at our house.  Check it out:

fresh grown peppers all winter long

Anyway, after about 7 or so  hours, I opened the crock pot,checked the meat, and found it to be nice and tender.

All done!

cutting board shot

Final Plate Shot

I served the vegetables over brown rice.  I was going to steam or saute some greens to go with the meal, mostly just to have something to lighten up the meal.  I was expecting the heaviness that goes with the usual pot roast preparation on top of this being a relatively fatty cut of meat. (Chuck has more fat than the round cuts, for example.)   But, unlike a pot roast dinner, this meal had a delightful lightness about it.

The hot spices certainly made it more easy to digest and “thinned” out the fatty flavor/texture.  And corn and bell peppers are less dense than the traditional potato, turnip, and/or carrots served with a traditional pot roast meal.

In any case, Steve and I both thought this was superb.  But visually, I think meal could use some more green. And, upon re-reading the article containing the original recipe, I noted a recommendation to serve green beans with this meal.  I have a great recipe for blanched, then quickly sauteed green beans with garlic and red pepper flakes…  Next time, again!

Anything Goes Quesadilla Casserole

Talk about easy – and, if ingredients are chosen  with a bit of thought, healthier than one would think.  And really tasty, too!

Just look at this:

final quesedilla plate

This was SOOOOO good....and easy to make!

Note: Click  HERE for my guacamole recipe.

This was my second time making quesadillas – both times as a baked casserole with layers of flat tortillas rather than folding the tortillas in the traditional manner.   For cookware, I used glass pie plates and made enough filling for  two “casserole/pies.”

Here is a basic outline of ingredients:

  • Olive, canola, or other vegetable oil or spray as needed for sauteing and “greasing” pans.
  • 1-2 cups veggies – For example, I used onion, ½ green pepper, 1 smallish carrot, and 2 cloves if garlic
  • 1 or 2 fresh chili peppers (I used 2 salsa chilies from my bedroom “garden,” one green and one more ripe and thus red.)  OR, red pepper flakes or cayenne, to taste.  Maybe start with 1/2 teaspoon? Depends on your taste and how hot your chili power or taco seasoning is.
  • 2-3 cups of any combo or just one: poultry, beef, pork, beans.  Any meat should be ground or, if using leftover cooked poultry or meat, shredded. I used 1/2 lb ground beef and a cup of kidney beans, both of which I found in the freezer.  🙂
  • 3 or so cups grated cheese, divided.  Your choice of cheese(s).  (I used mostly sharp cheddar with some smoked cheddar this time.  Smoked Gouda is really good in quesadillas, too!)
  • Salsa, as needed or desired.

And, here’s how you do it:

  1. Preheat oven to 350 degrees
  2. Chop veggies, including any fresh chilies, and saute in olive or canola oil until somewhat tender, then remove from pan.  (If using dried red pepper flakes, include them here with the fresh veggies.)
  3. If starting with raw meat or poultry, add to pan and cook before adding other ingredients. Then, combine any meat, poultry, and or beans with the package (or homemade equivalent) of taco seasoning, and 1/2 cup or so of water.
  4. Heat until thickened.

To assemble a pie:

  1. Lightly grease pie plate.
  2. Place a tortilla in the pie plate and spread a little sauce on it, flip over, and repeat.
  3. Cover with some meat/veggie mix, sprinkle with cheese, and to with dots of salsa to taste.
  4. Place another tortilla on the pie and repeat layers.
  5. Top with one more tortilla and cover with a light coating of sauce and cheese.
  6. Pop in the oven and check after 20 minutes. If it is bubbling and toasty brown on top, it’s done!

Serving suggestion: As show in the picture at the beginning of this post, serve with salsa, guacamole, and sour cream (or yogurt).

First the veggies - oops! I took this before adding the chilies.

Cooked ground beef, beans, and veggies before adding taco seasoning

Lightly coat both sides of bottom tortilla with sauce

Add the meat/veggie/bean mix

Sprinkle with some cheese

Dot first layer with salsa to taste

add another tortilla and coat with more sauce

Add another tortilla and coat the top with sauce

then more veggies...

Then more cheese...

top off with a tortilla, with a bit of sauce and cheese to cover

I didn’t remember to take a picture of the the fully assembled pies until after they were the oven for a minute or two.

As shown, I used the top oven of my new dual-oven, five-burner gas range.  🙂  For those wondering, it is a Maytag Gemini.  Pricey for home cooking, but a reasonable deal if you want some features approaching the  professional level (I love the 16,000 BTU burner!)  at a relatively modest price.

But, I digress.  Once the quesadilla casserole (or pie) is done, you can leave it in a warm oven (170 degrees works well) until you are ready to eat.   And, it reheats wonderfully, which is why I always make enough for a few meals.

The best thing about quesadillas, though, is that you really can’t go wrong.  Whether you just use cheese in a folded tortilla that you heat in a frying pan, or compile a complex, multi-layered creation, it is all good.  And, you  can stretch your dollar by using more or all veggies and/or beans, and reduce calories by using low-fat cheese and accompany with low fat sour cream or yogurt. And, for you non-lacto vegetarians,  just use soy cheese and “yogurt.”

Now I am going to have start  experimenting with homemade salsa recipes.  Can you believe I have never made my own salsa?  One of these days…  🙂

I’ll leave you with an offering of food art:

Just a fun shot of the salsa chilies and some guacamole ingredients

Salsa chili peppers from our indoor plants and two guacamole ingredients

Stuffed Cabbage

The one other time I attempted making stuffed cabbage, I ended up with a bit of a mess because I didn’t know the trick to geting the cabbage leaves off the head intact and also pliable enough to roll and stay rolled.  But, this time – success!

I started with this Stuffed Cabbage recipe from Allrecipe.com, but, I made some changes, as noted.

INGREDIENTS

* 1 medium head cabbage
* water to cover
* 1 pound ground beef  [I used 2/3 beef to 1/3 pork.  Farmland grinds them together for you if you ask, but you have to order at least 1.5 lbs, total. I got 2 lbs total and froze the other lb for a later date.]
* 1 cup cooked rice
* garlic powder to taste [1 tablespoon finely chopped fresh garlic and 1 tablspoon chopped fresh parsley]
* 1 egg
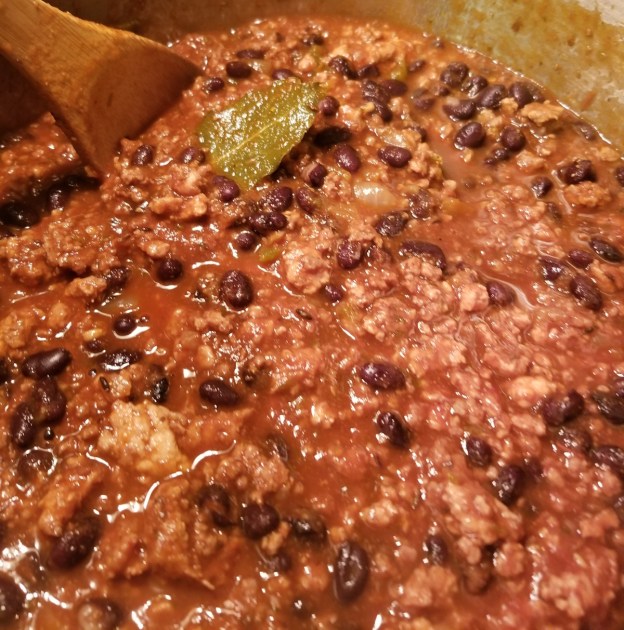
* 1 (12 fluid ounce) can tomato juice [a 26 oz jar of pasta sauce in lieu of the rest of the ingredients, except for a bit of water to cover.]
* 1 tablespoon vinegar
* 1 tablespoon white sugar
* water to cover

DIRECTIONS

1. Place the head of cabbage in a large pot over high heat and add water to cover. Boil cabbage for 15 minutes, or until it is pliable and soft. Drain and allow to cool completely. Remove the hard outer vein from the leaves.
2. In a separate large bowl, combine the beef, rice, garlic powder and the egg, mixing well. Place a small amount, about the size of your palm, into the center of a cabbage leaf and fold leaf over, tucking in the sides of the leaf to keep meat mixture inside.
3. Pile up the filled leaves in a large pot, putting the larger leaves on the bottom. Add the tomato juice, vinegar and sugar and enough water to cover. Simmer over medium low heat for about 60 minutes. (Note: Keep an eye on them, making sure the bottom of leaves do not burn.)

The instructions for getting the cabbage leaves off really works.

the one cabbage from my garden

the one cabbage from my garden

First, I cored the cabbage.  Not a major operation, but just some of the inner stem.

kind of hard to see, but some of the core removed

kind of hard to see, but I removed some of the core

Next, I brought a pot of water to boil and gently place the cabbage in the pot.  Within a minute or two, the leaves started getting really loose.

peelaway1

peelaway

I kept carefully peeling off the leaves as they loosend and, once I had about 14 leaves peeled off, I removed the rest of the cabbage and let the removed leaves simmer for another 5 minutes.  Then I drained and rinsed them in cold water.

In the meantime, I had to cook some rice.  I was disappointed that I had not thought to put the rice on sooner because I wanted to use brown rice and that takes longer than white rice.  But, I then noticed that there were microwave instructions on the long-grain brown rice package.   (Obviously not Lundberg brand – at least I can’t imagine they have microwave instrcutions on their rice.  I’ll have to double check one of these days.)

Anyway, I decided to try microwaving the rice.  Click HERE for the instructions I used.

Here is the deal.  It was passable for use in stuffed cabbage and the stuffed eggplant I make a few days later, but it really didn’t cook much more quickly than if I had cooked it stovetop.  And DO NOT microwave brown rice for use as a side dish!!!!  YUCK!  The texture is awful.

Okay, back to the stuffed cabbage.  After cooling the cabbage and mixing up the meat with the other stuffing ingredients, I put it all together. As noted in the recipe, just a plam-full is enough for each roll.

palmfull

Then, roll away!

roll1

roll2

roll3

rolled

manyrolls

And here they are, ready to go into the pot.  By the way, that god-awful looking cookie tray and that scratched up red plastic thing is my “raw meat” cutting board.  I really need to get a regular board to dedicate to raw meat! But, in the meantime, it works and contains any straying liquids.  BOB, don’t read this!  Bob is is friend of mine who is vegetarian.  For a vegetarian option, tempeh, bulgar wheat, and/or ground/finely chopped seitan (wheat gluten) would be excellent in a stuffed cabbage.

The final step is to coat the bottom of a big pot (I used my 6 quart dutch oven) with a thin layer of sauce/juice, add the cabbage rolls, cover with sauce/juice, and add a bit of water if you need to have the liquid cover, or just about cover the cabbage rolls.

simmering

Then, simmer for an hour or so until tender.

I was pleased with the results, although both my husband and I noted that these were not like our Mom’s.  I will try it with the tomato juice/vinegar/sugar next time – unless I borrow back my Mom’s recipe box from my sister-in-law Lorraine and try my Mom’s recipe first.  (We take turns having the recipe box at each of our homes.) I am pretty sure her “Glopskies” had stewed tomatoes in them.  Hey Lori – remember Glopskies?  (Long story….BUT, that reminds me, I need to get the “girls” together to make what my Mom called Chris Chickies, a Polish version of bow pastries. )

ANYWAY – this is a great basic recipe for stuffed cabbage.  And the possible variations are endless for all, whether you are omnivore or vegetarian. A winner, all around.

[Disclaimer – I am way too tired to proofread this.  Please ignore typos unless they could cause an grievous error in the kitchen.  🙂 ]

Grilled marinated flatiron steak, fresh green beans, and potatoes…

This was such a low-key yet delicious meal.  Flatiron, or top blade steak, has  “a rich, deep, beefy flavor,”  to quote the guys who wrote “The Complete Meat Cookbook” (Aidells and Kelly). Yes, there is the “signature” line of gristle down the middle of the steak,  but for the economical price and BIG flavor, it is worth a little work!

I marinated four steaks (they are not big) for about 4 hours in one of my favorite marinades from the same cookbook. I lucked out and found the marinade recipe  online – how easy to cut and paste!  <grin>  NOTE: I poke holes in both sides of the steaks with a toothpick before marinating. Every 1/2 inch or a bit more or so.

##
Chipotle-Orange Marinade

From The Complete Meat Cookbook (Canada, UK), by Bruce Aidells and Denis Kelly.

Ingredients:

2 tsp grated orange zest
1 cup fresh orange juice
3 Tbsp fresh lemon juice
1 tsp minced garlic
1/3 cup vegetable oil
1/4 cup soy sauce
1 Tbsp chopped canned chipotle chile in adobo, Herdez brand, or 1 tsp red pepper flakes
1/2 tsp salt
1 tsp freshly ground black pepper

Instructions:

Combine all the ingredients in a small bowl.

Yield: Makes 2 to 2-1/2 cups
##

FYI – I often use chili garlic sauce in lieu of garlic and chilies, but this time I used the garlic as called for in the recipe and the teaspoon of red pepper flakes.  It is all good! Actually, for this meal, I used lemon zest instead of orange.  No matter.  I think anything citrus is the key.

After the four hour soak,  I removed the steaks from the marinade, gently patted them dry with a paper towel, and put them on a baking rack over a pan and set aside (in a safe place since one does not want to sorely tempt the dog and cat) to get closer to room temperature before grilling.  NEVER more than a hour for that! The goal  is to get the inside temperature close to that of the outside for more even cooking, but be safe!

Steve was, as always, the grill person – he removed the steaks  from the grill once they registered about 125 or so degrees with an instant read thermometer.  We then let them rest for a bit while covered in foil.

NOTE:  the one thing I do NOT do in “the kitchen” is grill.  So, that is all I can say about that, except that they came out just a touch more than rare but not at all medium-rare, and I could cut mine with a dinner knife.  YUM.  🙂

We were blessed with green beans from the garden I am attempting to help with (long story, but it is doing pretty darn well with way less attention than it deserves!), and the recipe was quick and easy.

##
Sesame Green Beans (click recipe name to go to the allrecipe page)

* 1 tablespoon olive oil
* 1 tablespoon sesame seeds
* 1 pound fresh green beans, cut into 2 inch pieces
* 1/4 cup chicken broth
* 1/4 teaspoon salt
* freshly ground black pepper to taste

DIRECTIONS
1. Heat oil in a large skillet or wok over medium heat. Add sesame seeds. When seeds start to darken, stir in green beans. Cook, stirring, until the beans turn bright green.
2. Pour in chicken broth, salt and pepper. Cover and cook until beans are tender-crisp, about 10 minutes. Uncover and cook until liquid evaporates.

##

FYI – I only had about 10 oz of beans and used 1/2 cup stock.  It is a flexible recipe.

I also served potatoes.  I bought some small, new, red potatoes from Farmland, my favorite  grocery store here in Wakefield MA.  I cut them in half and steamed them until tender while heating up the water in the bottom of my double boiler.  Once fork-tender, I put them in the top of the double boiler with some butter – okay, I used Smart Balance ™ – and a dash of lemon juice.  The double boiler kept them nice and hot without overcooking them until the rest of the meal was ready to serve. by the way, you can keep things hot, safe, and not overcooked for a long time in a double boiler.

And….Along with the garden I am helping with, we are doing container gardening here at Armory St.  We had our first tomato this evening.  yuuuuuum….  I sliced it and put it over a bed of romaine lettuce (also from that other garden, although we have plenty or green leaf lettuce growing stupendously well in some boxes on our attic balcony) sprinkled with oregano and then drizzled in olive oil.  WOW.  THAT was such a treat.

So, that is the latest – enjoy!