Just for fun – I picked peppers, rosemary, and basil to use in a homemade sauce – with tomatoes from Farmer Dave, of course – the other day. I just thought it looked pretty, so here is a picture.
🙂

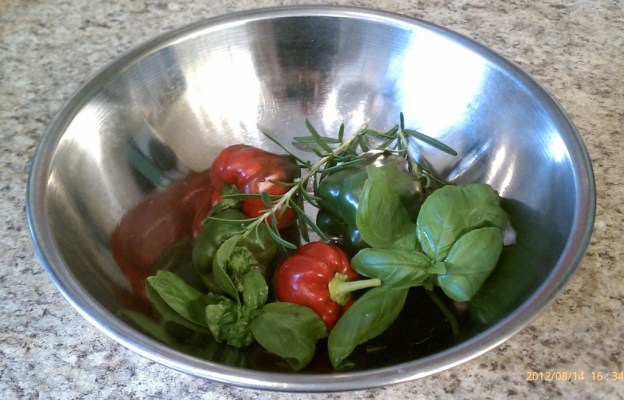
Just for fun – I picked peppers, rosemary, and basil to use in a homemade sauce – with tomatoes from Farmer Dave, of course – the other day. I just thought it looked pretty, so here is a picture.
🙂
A big THANK YOU to Marcia Calvin, one of my fellow members of the Wakefield Unitarian Universalist Church, for bringing this lovely salad to our church potluck picnic last Sunday!
I love potlucks. They provide a wonderful opportunity to try new dishes and enjoy old favorites such as Mary Adele Taylor’s deviled eggs. Yum! 🙂
The only drawback is that, with so many different items, it can sometimes be a bit difficult to really appreciate a unique dish, such as this interesting combination of fruit and fish, at a potluck. Also, Marcia had thoughtfully provided the dressing on the side for those who may want to save some calories and I forgot to add the dressing when I tried the salad. But, I was very intrigued and wanted the whole experience, so I asked for the recipe.
I am thinking Marcia should do a cooking blog, too. Along with the recipe, she provided detailed notes and also included what looks to be a a great recipe for baked fish. I’ll have to try that one soon!

The ingredients gathered
So, here is the recipe, noting a few options beyond the recipe that Marcia shared with me:
Salmon Summer Fruit Salad
Dressing:
1 shallot, chopped
1 tablespoon chopped fresh dill or 1 teaspoon dried dill weed
1 tablespoon chopped fresh parsley or 1 teaspoon dried parsley flakes
5 tablespoons raspberry vinegar
1/4 cup olive or vegetable oil (one version calls for just 1 tablespoon)
2 tablespoons pecans (walnuts work fine) OR
1 tablespoon honey (one version has honey instead of nuts)
1/2 teaspoon lemon juice, or more, to taste
Salad:
3 cups torn leaf lettuce
2 cups torn Bibb lettuce (I used mostly romaine and some of whatever type is in my garden)
1 (7.5-oz.) can pink salmon, drained, skin and bones removed – or buy fresh and cook it yourself.
2 medium nectarines, sliced (or equivalent of chunks of orange)
1/2 cup fresh raspberries
Directions:
1. In small bowl, combine all dressing ingredients; beat with wire whisk until blended.
Or:
Use a small food processor and pulse to mince the shallot and green herbs first, then add the nuts and pulse to coarsely chop, then add the vinegar, oil, and lemon juice (and honey if using instead or in addition to nuts) and pulse just until blended.
2. In large bowl, combine all salad ingredients except raspberries. Drizzle with dressing; toss gently to coat. Gently fold in raspberries.
Serving Suggestions:
Serve on individual salad plates or in Tortilla Salad Shells.
Tip: The dressing can be made ahead of time and refrigerated for several hours or overnight.

1/4 cup or so chopped shallot. This shows a scant 1/3 cup.

This makes about one tablespoon, chopped.
I made the salad a few hours before heading out to a Linden Tree Coffeehouse* volunteer appreciation party on June 18 and decided to bring it with me to get additional opinions beyond Steve’s and mine. WELL!!!! It was a resounding success! So much so that Steve didn’t get a chance to try it that evening. So, I made it again the next day.
Upon arriving home with more raspberries and salmon, I realized that I had forgotten nectarines, although, the chances of getting ripe ones were small anyway. In fact, after receiving the recipe and purchasing the ingredients mid week, it was not until Friday that the nectarines were ripe enough to use.
So, there I was, and I didn’t want to got back to the store again, anyway. But, since the dressing contains lemon juice, I suspected that one could substitute with an orange. Just to make sure, I searched online for recipes with salmon and orange. That’s when I found on very similar to the recipe Marcia sent me that had honey instead of nuts in the dressing, either one a thickening source, I am guessing. Just use honey if you want it more sweet or don’t have pecans or walnuts on hand.

The Dressing - with nuts, not honey
And, speaking of substitutes, online research told me that walnuts are a good substitute for pecans, so, since walnuts were what I had, that is what I used. And, I suppose you could use onion instead of shallot, but I wouldn’t recommend it unless you used Vidalia or other sweet type of onion. But, frankly, I am a huge fan of shallots and always make sure to have plenty on hand.
Bottom line is that this salad is excellent with either nectarines or fresh chunks of orange. I saw recipes with salmon, that call for canned manderin orange pieces, also, so that would be another option.

pre - dressing

Nectarine version - with dressing

with chunks of orange, dressed
A few more notes: I used mostly romaine lettuce, because that is what I had in my fridge. I did supplement it with greens from my box garden, though.

Some kind of lettuce and arugula
I am pretty amazed by how prolific this lettuce is. I picked 7 or eight leaves total two days in a row and it seems to grow back overnight. Now I need to really leave it alone so it has a chance to really get going!
And, the final note: Rather than used canned salmon, Marcia bought fresh salmon and cooked it herself, which was an excellent touch to her version. And, I’d recommend doing that if you have the time and can find some good fresh salmon. But, I do think, flavor-wise, the canned works quite well, since there are so many other flavors going on in this dish.
But, whatever you do, I recommend trying this recipe. It is especially good for potlucks because, along with tasting great, the unexpected mix of ingredients is a great conversation starter.
* Along with a fun jam session later in the evening at the Linden Tree Coffeehouse party, we were treated to excellent music by Gail Rundlett and her son Julian. Gail really liked the salad, by the way. 🙂
Okay – this is REALLY GOOD. Unbelievably good, in my opinion – with that opinion shared by my husband. It is a WOW. It gets even better when leftover and it goes especially well with strongly-flavored vegetable such as fiddle heads (in the spring when you can get them) or Brussels sprouts. Click HERE for my fiddlehead recipe that goes with this casserole perfectly.
Click HERE for the original recipe on Allrecipes.com, a site that I love.
Here is my version. It is not much different from the original except that I added shallots and changed the amounts of some of the ingredients. I am sure that the original is just as fabulous.

Here are the veggies and chicken breast pre-chopped - food art! 🙂

And here they are chopped, plus the RV olive oil

Seasoned and ready to mix with the veggies et al

Note that I mixed everything in a separate bowl - the 12 inch fry pan was too small!

THEN it went into the 9 x 13" three quart baking dish

I have discovered the perfect tomato/pasta sauce. You can leave out the sausage for a delicious vegetarian version, or use another type of meat. Use just one or all or less or more of the optional ingredients, simmer for as short or long a time as you want, but use this (or Mark Bittman’s original recipe) as your basis for sauce from canned tomatoes and you can’t go wrong. I used all the optional ingredients but the mushrooms when I took the pictures for this post. But the last time I made it, I used all but no bell pepper. And, my first version had no meat and no mushrooms. Each was super. Just have fun with this one!
Note: if using sausage or another sort of meat, be sure to brown it in the same pot you are using to saute the veggies and simmer the sauce. You don’t want to lose any flavors.
All-purpose tomato sauce
Based on a recipe by Mark Bittman
https://today.msnbc.msn.com/id/29633150/

From the plants that wintered over in our bedroom. Still going strong in March!
Here is my version:

Just one of my "bunch of ingredients" shots. 🙂
Directions:
If using sausage, heat the 2 T olive oil in pot over medium heat, add the sausages, and brown each side, about 8 minutes total. Remove from pan, set aside, and cut into pieces before adding back to the sauce.

Brown the sausages at least 4 minutes per side.
Put the 1/4 olive oil in the pot over medium heat.

Add the 1/4 olive oil to the leftover fat and brown bits from the meat, if using.
When the oil is hot, add the onions, sprinkle with salt and pepper, and cook, stirring occasionally, until soft, about 3 minutes.
Then add garlic and, if using, chili salsa peppers, bell pepper, and/or mushrooms and cook for another few minutes.

All the veggies - no mushrooms in this round.
Next, slice and add the browned sausages or other meat, if using, the tomatoes, and as much liquid as you would like depending on desired thickness and how long you have to simmer the sauce.

Next - the sausage, or other meat, if using
Add sugar and dried herbs and cook, stirring occasionally, until the tomatoes break down and the mixture comes together and thickens. The longer, the deeper the flavor! Although, it still tasted great with a shorter simmer. But, be sure to taste for spiciness as you simmer if using the fresh hot peppers and remove if the fire gets more than you like.

starting to simmer
Once it is at the thickness you want, taste, adjust the seasonings, stir in any fresh herbs, and keep warm. (Or let cool, cover, and refrigerate for up to several days; reheat gently before serving.)

Close to being done - time to take out the salsa chili pepper!
I am so pleased with this recipe. Never mind the vibrant taste with no extra sodium, etc., it makes more the the 24-26 oz that comes in most jars of sauce. I am sorry, 26 oz is just NOT enough if you want more than a smidgen of leftovers!
Oh, I need to include an apology, here. I recently used this recipe for a church potluck . I was careful to chop only one hot pepper and then put only one whole not pepper to simmer in the sauce for a while. I kept checking the level of heat while simmering and took out what I thought was the ENTIRE hot pepper almost two hours before serving time…Unfortunately, the pepper had split and I had taken out only HALF of that pepper when I deemed the sauce flavorful but safe for a potluck… Church and cooking friend Marjorie, whom I told about my error, did report that it was hot, but I didn’t see anyone in active distress – I am hoping everyone who tried it liked it hot!
But, next time, the hot peppers will go in cheesecloth for easy and complete retrieval!
I found a small chuck roast on sale – but really didn’t want to do the typical pot roast or beef stew thing. What to do? Well, I found a recipe with a spicy Cajun flavor and just had to try it.
Here is the link to the recipe I found online: Cajun Roast with Maque Choux. See this link for an explanation of Maque Choux.
I have also copied the recipe here, followed by my comments and photographs.
**************************************
Cajun Roast with Maque Choux
Makes 6 servings
Ingredients:
1 (2 to 2-1/2 lb.) boneless beef chuck roast
1 Tbsp. dried Cajun seasoning
1 (9-oz.) pkg. frozen corn
1 small onion, chopped
½ green pepper, chopped
1 (14.5-oz.) can diced tomatoes, undrained
1/8 tsp. pepper
½ tsp. salt
½ tsp. hot sauce
Cayenne pepper, to taste
Preparation:
Rub entire surface of beef roast with Cajun seasoning. Place roast in a large slow cooker. Top with corn, onion and green pepper. In a small bowl, combine tomatoes, pepper, salt and hot sauce; mix well. Pour over vegetables and roast. Cover and cook on low for 8-10 hours. To serve: Cut roast into slices and serve corn mixture with a slotted spoon.
************************************
This recipe was REALLY quick and easy to prepare. Here is a shot of all the ingredients except for the pinch of cayenne. By the way, I might add either another teaspoon of hot sauce or a a few extra pinches of cayenne next time. Although, I had better wait to see how spicy it is the 2nd day around.

All the ingredients - except for the cayenne
I just love the way raw ingredients look in a picture. According to one definition of alchemy, cooking is indeed of that art. From the Webster Online Dictionary definition of alchemy: 2 : a power or process of transforming something common into something special.
Speaking of something special, I really like the Sriracha Hot Sauce that I used in this recipe. I think I saw it recommended in Bon Appetit. See my Recommended Kitchen Things page.

With the rub on the beef
You maybe have noticed that I actually used a seasoning blend called “blackened creole blend” by Frontier Co-op, rather than Creole seasoning. See my Recommended Kitchen Things page. From my research, opinions range from hard-core camps on both the Cajun and the Creole sides who define the two styles of cooking and seasoning as totally distinct, to folks of all levels of expertise saying that much merging has happened between the two cooking styles, or at least the types of seasoning used. However, I want to research that further.
But for now, I can vouch for the tastiness of this recipe using the Creole blend, which is what I happened to have in my spice cabinet.

Where's the beef? (Sorry, couldn't resist...)
This really was so easy to put together. Just chop the veggies and put them in on top of the meat….

Sauced and ready to go
…and mix the sauce ingredients and pour it over everything. Oh, a note about the called for 1/2 a green pepper. I had maybe 1/3 of one, but grabbed a ripened, and thus red one from the bell pepper plant that wintered over inside at our house. Check it out:

fresh grown peppers all winter long
Anyway, after about 7 or so hours, I opened the crock pot,checked the meat, and found it to be nice and tender.

All done!

cutting board shot

Final Plate Shot
I served the vegetables over brown rice. I was going to steam or saute some greens to go with the meal, mostly just to have something to lighten up the meal. I was expecting the heaviness that goes with the usual pot roast preparation on top of this being a relatively fatty cut of meat. (Chuck has more fat than the round cuts, for example.) But, unlike a pot roast dinner, this meal had a delightful lightness about it.
The hot spices certainly made it more easy to digest and “thinned” out the fatty flavor/texture. And corn and bell peppers are less dense than the traditional potato, turnip, and/or carrots served with a traditional pot roast meal.
In any case, Steve and I both thought this was superb. But visually, I think meal could use some more green. And, upon re-reading the article containing the original recipe, I noted a recommendation to serve green beans with this meal. I have a great recipe for blanched, then quickly sauteed green beans with garlic and red pepper flakes… Next time, again!
Talk about easy – and, if ingredients are chosen with a bit of thought, healthier than one would think. And really tasty, too!
Just look at this:

This was SOOOOO good....and easy to make!
Note: Click HERE for my guacamole recipe.
This was my second time making quesadillas – both times as a baked casserole with layers of flat tortillas rather than folding the tortillas in the traditional manner. For cookware, I used glass pie plates and made enough filling for two “casserole/pies.”
Here is a basic outline of ingredients:
And, here’s how you do it:
To assemble a pie:
Serving suggestion: As show in the picture at the beginning of this post, serve with salsa, guacamole, and sour cream (or yogurt).

First the veggies - oops! I took this before adding the chilies.

Cooked ground beef, beans, and veggies before adding taco seasoning

Lightly coat both sides of bottom tortilla with sauce

Add the meat/veggie/bean mix

Sprinkle with some cheese

Dot first layer with salsa to taste

Add another tortilla and coat the top with sauce

then more veggies...

Then more cheese...

top off with a tortilla, with a bit of sauce and cheese to cover
I didn’t remember to take a picture of the the fully assembled pies until after they were the oven for a minute or two.
As shown, I used the top oven of my new dual-oven, five-burner gas range. 🙂 For those wondering, it is a Maytag Gemini. Pricey for home cooking, but a reasonable deal if you want some features approaching the professional level (I love the 16,000 BTU burner!) at a relatively modest price.
But, I digress. Once the quesadilla casserole (or pie) is done, you can leave it in a warm oven (170 degrees works well) until you are ready to eat. And, it reheats wonderfully, which is why I always make enough for a few meals.
The best thing about quesadillas, though, is that you really can’t go wrong. Whether you just use cheese in a folded tortilla that you heat in a frying pan, or compile a complex, multi-layered creation, it is all good. And, you can stretch your dollar by using more or all veggies and/or beans, and reduce calories by using low-fat cheese and accompany with low fat sour cream or yogurt. And, for you non-lacto vegetarians, just use soy cheese and “yogurt.”
Now I am going to have start experimenting with homemade salsa recipes. Can you believe I have never made my own salsa? One of these days… 🙂
I’ll leave you with an offering of food art:

Salsa chili peppers from our indoor plants and two guacamole ingredients
This was really tasty! I was unsure when I first viewed the recipe, but I am really glad I tried it.
I bought a Sicilian eggplant from Farmer Dave at the Wakefield Farmer’s Market and didn’t feel like doing the usual garlic, olive oil, and/or tomato-based thing, or even cheese, but did want a “one pot meal” with some kind of animal protein. I found this nifty Chicken Breast With Eggplant, Shallots and Ginger recipe by Matt Bittman via Bitten, Recipe of the Day, in the New York Times. Click the title to see the original post.
Chicken Breast With Eggplant, Shallots and Ginger
Here is the original recipe with my adaptations added in brackets.
Ingredients

everything but the chicken
It is hard to see here, but the mint leaves in with the parsley have a purplish hue that went nicely with the eggplant in this picture.
Method

peeled shallots
Half of one my big shallots had rot. Plus, you lose a lot when peeling. Here is what was left to use, which was quite enough to do the trick. Don’t they look lovely? I just love shallots.

into the frying pan

next, add the eggplant

This was one "leg" of the ginger and made one Tbsp minced
Here is a trick for mincing ginger: slice it one way, then turn 90 degrees and slice again. to get the results in this picture. Next, slice crosswise in tiny increments. Finish up mincing to desired size.

the eggplant "relish" all cooked and ready to go

chicken ready for broiler

chicken done

ready to eat!
Okay, I’ll admit it. I was so excited to serve and eat the meal that I forgot to take a photo of it plated the night I first made it. But, I had leftovers and took the above picture before creating the meal for the next evening. But, it looks about the same. <grin>
I am really glad I took a chance on this recipe. While I like just about anything, even I was not sure about the flavor mix, whether or not I would use cilantro or when I had to find a substitute and decided upon the parsley/mint mix. And, I had no idea what Steve would think. Steve actually had a little trouble with the mint the first night, although he admits it was because it was such an unfamiliar flavor to him in a main course. But he really enjoyed it the second evening. I, on the other hand, was not at all sure about the cilantro and obviously have yet to find out how that works in this recipe. However, I was very comfortable with the mint, being used to Middle Eastern food and having used chocolate mint in my hummus in the past. [Note to self: now that I have a chocolate mint plant, it is time to revive that hummus recipe – and the tabbouleh!]
I am blessed to have a space in a “borrowed/cooperative” garden in which I have enough basil plants that I can pick enough basil at one time to equal 3 packed cups. Time for pesto, of course!
An added bonus was freshly picked garlic from Farmer Dave of Dracut Mass who is at the Wakefield Farmer’s Market each Saturday. I had some walnuts in my freezer (just toasted them up a bit and they were fine) and parsley from same garden as the basil source, good olive oil… It was heavenly!
Here is the recipe I used as a guide – from Cook’s Illustrated – followed by my notes and pics:
##
Makes 3/4 cup, enough for 1 pound of pasta. Published July 1, 1996.
Pounding the basil releases its flavorful oils into the pesto more readily. Basil usually darkens in homemade pesto, but you can boost the green color a little by adding the optional parsley. For sharper flavor, substitute one tablespoon finely grated pecorino Romano cheese for one tablespoon of the Parmesan. The pesto can be kept in an airtight container, covered with a thin layer of oil (1 to 2 tablespoons), and refrigerated for up to four days or frozen for up to one month.
Ingredients
1/4 cup pine nuts , toasted (or substitute almonds or walnuts)
3 medium cloves garlic , unpeeled
2 cups packed fresh basil leaves
2 tablespoons fresh parsley leaves (optional)
7 tablespoons extra-virgin olive oil
Salt
1/4 cup finely grated Parmesan cheese or Pecorino Romano
Ground black pepper
Instructions
1. Toast the nuts in a small, heavy skillet over medium heat, stirring frequently, until just golden and fragrant, about 5 minutes; set aside. Add the garlic to the empty skillet and toast over medium heat, shaking the pan occasionally, until fragrant and the color of the cloves deepens slightly, about 7 minutes. Let the garlic cool slightly, then peel, and chop.
2. Place the basil and parsley (if using) in a heavy-duty 1-gallon zipper-lock plastic bag. Pound the bag with the flat side of a meat pounder or rolling pin until all the leaves are bruised.
3. Process the nuts, garlic, herbs, oil, and 1⁄2 teaspoon salt in a food processor until smooth, stopping as necessary to scrape down the sides of the bowl, about 1 minute. Stir in the Parmesan and season with salt and pepper to taste.
##
First – I was wondering, just HOW packed should the cups of basil leaves be? So, I packed them pretty much to the max a few times and weighed the results each time. 1.5 ounces per cup is what I got consistently.

1 cup packed basil equals 1.5 oz. That's a one cup measure to the left.
I had 3 cups/4.5 oz of basil leaves, to I increased amounts accordingly, although I lost concentration early on and toasted 3 times the amount of walnuts instead of 1 and 1/2 times, and also added .2 oz of leftover pine nuts I found in the fridge – but the pesto didn’t suffer from it!
Here is a shot of the freshly picked garlic from the Farmer’s Market that I used:

By the way, the knife you see in my pics was given to me by my Mom about 20 years ago. It is a great knife. And, I am lucky enough to have a live-in knife sharpening expert who keeps it and all my knives in most excellent shape!
Here is the end result:
Tomatoes picked from our backyard “whisky barrel” garden seasoned with a bit of dried oregano, freshly ground pepper, and salt, and then drizzled with olive oil,
The above-described pesto, and
Totally amazing “aged 3 years” cheddar cheese purchased at, yes, you guessed it, the Wakefield Farmer’s Market from Phil Hermann and MooBaaNaa Cheese. (I bought the ricotta today, also, and look forward to trying it. Phil said it is great for dessert with a touch of honey.)
But, here is our little appetizer feast:

YUM. There is nothing else to say.

Fresh Mozarella purchased at the Farmer’s Market from “The Cheese Man” Phil Hermann, who brings locally made mozzerella, ricotta and goat cheese to the market. Basil, also from the Farmer’s Market. Tomatoes from our back yard. A little olive oil, salt, pepper and a touch of rice vinegar – out of this world!

and to think that you saw it on Armory St
I was trying out a marinade recipe and liked the way these ingredients looked on the cutting board. I’ll report on the marinade later – the chicken is soaking as I write.

The lovely cutting board was made by Mark Calabrese. I recieved it as a Christmas gift a number of years ago (Thanks, Susan and Mark!) and it has been a favorite in my kitchen ever since. You may not be able to tell from this photo, but the ends are 1/4 inch wider on each side, causing the body of the board to be up off the counter. While it causes chopping to sound louder, the benefit of keeping the bottom side totally clean, regardless of what might be on the counter, greatly outweighs any noise issues. Here is a picture that shows it better:

The cutting board - side shot
