Author Archives: wadennis42

No-Fuss Alfredo Sauce, Brussels Sprouts, and Bacon-Wrapped Water Chestnuts – Who would have thought?

First let me thank Fior D’Italia (The Pasta Man) for the most wonderful ravioli that inspired an amazing meal!

For a change, I’ll start off with a picture of the plated meal, albeit taken after one ravioli had already been had eaten.

plated meal

The Meal. 🙂

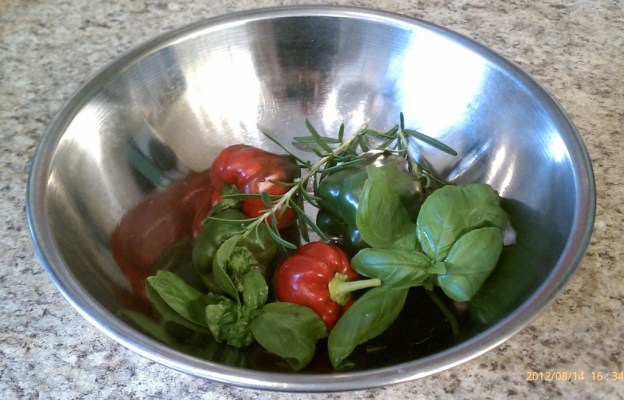
And here is the wonderful ravioli that I had purchased at the Wakefield Farmers Market in October.

Gorgonzola and Walnut Ravioli from Fior D'Italia (The Pasta Man)

Gorgonzola and Walnut Ravioli from Fior D’Italia (The Pasta Man)

Let me go on the record as saying that this is good stuff – really good stuff!

Okay, on with the hows and whys of this meal coming together on a Friday night after a REALLY Loooooong week….

The actual inspirations were:

1) It was 5:30 p.m and I had not yet planned a meal

2) Even though I freeze meats in single serving sizes and use the cold water method to speed up defrosting, it was late in the day to get all that going,

3) I didn’t have any potatoes and we had already had a lot of grains during the week, so we were feeling fussy about the choice of carbohydrate side dishes and the Brussels sprouts were looking…tired, and there didn’t look to be all that many, so a “meat and potatoes” sort of meal was out of the running, and

4) The final nail in the coffin (apologies for the dramatic analogy) was that neither Steve or I wanted to go to Farmland to something prepared or quick and easy to prepare.  SO…

Into the freezer I went and found the ravioli and remembered that Deb (The Pasta Man vendor at the market) had given me a handout (that I had actually not lost) with recipes for sauces for different pastas.

Unfortunately, their recommendation for a sauce to pair with this ravioli was based on creme fraiche and I had none, nor have I ever cooked with it.  And, upon researching online (I would be one lost cook without the Internet!) I could not find what looked like an easy or satisfactory substitute for creme fraiche for which I had the ingredients.  However, I figured some sort of white sauce would work and found the perfect recipe for a quick Friday night dinner on a site that also featured a recipe for making your own Gorgonzola and walnut ravioli – NOT so good for a quick Friday night dinner. Thank goodness for The Pasta Man.  🙂

You can see the recipe from which I worked via the ravioli link, above, but here is my  version:

No-Fuss Alfredo Sauce

  • 2 tablespoon of un-salted butter
  •  clove of finely chopped garlic
  • 2-3 Tbsp minced shallot
  • About ½ cup or so of half & half
  • About ÂĽ cup finely grated parmesan cheese
  • Kosher salt and freshly cracked pepper to taste
  • 1 scant tsp cornstarch dissolved in 2 Tbsp cold water (optional)*

In a medium sauté pan melt the butter, add the shallot and garlic, and cook until until fragrant and getting soft. Then, stirring constantly, add the half & half, parmesan cheese, salt, and pepper. Set aside and prepare the ravioli as directed. When the ravioli’s are ready, using a slotted spoon or a spider, add directly to cream sauce and toss, gently, on low heat until sauce is warm again and serve. If you want a bit thicker sauce, add the cornstarch mix and heat until desired consistancy is reached.

Along with the dirth of a long list of ingredients and processes, I was instantly enamored by the fact that this sauce can be set aside and then gently reheated once the pasta is added.  There is no room for a fussy sauce in a “quick and easy” meal!

Note: the original recipe called for heavy cream. Substitution suggestions say to add butter to half & half, so I added a tablespoon of butter to the recipe.  I am thinking I should have reduced the half & half a bit to compensate for extra liquid since the sauce did seen quite thin, hence my adding the bit of cornstarch.  But, FYI, I did not notice any ill effects on the taste or texture from using the corn starch. In fact, there was no separation or graininess after the leftovers spent the night in the fridge, so I’d say that, if you “cheat” with cornstarch, providing you keep it to a modest amount, there will be no harm done. Unless you are a purest.  <grin>

Okay – on to the Brussels sprouts.  I was originally going to use a recipe that was a big hit at Armory Street on Easter 2012, Honey Dijon Brussels Sprouts.  But, as I began to mix the sauce ingredients, I started doubting the virtue of the mustard flavor in the scope of this meal and also just happened to think of the wonderful lemon-flavored dressing I had in the fridge:

This is great!

Not only is this delicious, it is made with much heart and soul.

Close up on the details.

Close up on the details.

The sales of this dressing benefits The DAVID A. DEMARIA FOUNDATION, a 501(c)3 non-profit organization, mission is to further assist children of Malden and the surrounding areas with their educational and athletic needs. The foundation was created in the memory of David A. DeMaria of Malden MA, March 19, 1985 – May 30, 2007.

Like I said in the caption, this dressing is made with much heart and soul.  And, flavor – did I say bold, bright, yet not overstated flavor?  I picked up my bottle of this dressing at Farmland.  To learn more about this dressing, see ddsdressing.com or click HERE to see the list of stores offering this handy and tasty product.

Now, back to the Brussels sprouts. Click the recipe name for the original Honey Dijon recipe – which is splendid, by the way.

As I mentioned above, they looked a bit tired so I perked them up by putting them in a bowl of cold water and sticking it to chill in the fridge for about 1/2 hour while I was preparing the bacon wrapped water chestnuts described later in this blog post.

refreshing the sprouts

Refreshing the sprouts – and there were more than I thought. 🙂

Honey Lemon Dill Brussels Sprouts
Note: measurements approximate. Season to taste.

  • 12 Brussels sprouts, halved
  • 1  teaspoons butter, melted
  • 1 1/2 teaspoons honey
  • 1 – 2 Tbsp lemon dressing
  • 1 pinch dried dill weed
  • 1 pinch onion powder

Place Brussels sprouts into a saucepan filled with lightly salted water. Boil over medium high heat until Brussels sprouts are just tender, 8 to 10 minutes; drain. Mix butter, honey, lemon dressing, dill weed, and onion powder in a large bowl.
Toss Brussels sprouts in the mixture to coat.

Note: If you don’t have lemon dressing you can improvise. But, I recomend trying to get some of this dressing. It is REALLY tasty and nice to have on hand for any recipe.

NOW for the moment you have been waiting for:

Orsini thought it was scallops in that bacon.  :)

Orsini thought it was scallops in that bacon. 🙂

Well, perhaps not. 🙂

Okay – I followed the next recipe as written. I had never heard of bacon wrapped water chestnuts until a week or so ago via a Facebook post by Budget Bytes (I think – can’t find it right now) but I thought it would be a fun to try.  And, since I had a can of water chestnuts on hand and a 8 oz pack of bacon in the fridge, this Friday night seemed a good night to try it out. A quick online search that included the words “quick” and “easy” resulted in a really easy recipe that was also very tasty.  Here it is:

Bacon-Wrapped Water Chestnuts

  • 1 (8 ounce) cans water chestnuts, drained
  • 1/4 cup soy sauce
  • 1/4 cup brown sugar
  • 8 slices bacon, cut in half crosswise

Marinate the water chestnuts in soy sauce for 1 hour.

marinating the water chestnuts

marinating the water chestnuts

Drain. Roll each chestnut in the brown sugar. Wrap each chestnut with a piece of bacon. Secure with a toothpick. ready to wrapwrapping

Arrange on a cake rack in a shallow baking pan.

IMPORTANT UPDATE:  Be sure to line the pan with foil!  I learned the hard way and just now, as I add this disclaimer five days later, finally got the pan clean after much soaking and scrubbing!
…carry on:

Bake at 400 degrees F for about 30 minutes or until golden brown. Drain on paper towels. NOTE: This can be prepared ahead of time and stored in refrigerator until ready to bake.

baking

Disclaimer: I used my countertop toaster/convection oven and they were done in 18 minutes.  Note to self: Next time, put foil on the pan so you don’t have to soak it for days to get the burned on fat and sugar off of it….

And, that’s it. And there’s more!  Steve got involved in the repair of his Martin guitar, so, while dinner could have been ready  in well under two hours, both the  bacon/chestnuts and Brussels sprouts held nicely at a warming temperature of 170 and the alfredo sauce was fine at room temperature until we were ready for dinner. Once we were ready to eat, I just cooked the ravioli and finished off the sauce.

And that’s it. Definitely a meal that works for an easy meal for two but can also be made for company and even a crowd. It’s a keeper at our house, that’s for sure!

Rice Pilaf – Small Effort for Something Special

Rice is good.  You can dress it up as little or as much as you would like.  And, dressing it up is an excellent way to get more flavor and a few more veggies into your meal, or even create a one-pot meal, albeit the latter is not the focus of this post.

I am planning a simple meal of sauteed salmon fillets, steamed broccoli, and rice.  I might create a post about the salmon in the future, but in the meantime, I am simply sauteing two 5 oz skinless fillets in olive oil (enough oil  so that the fish has a chance to get hot before hitting the pan directly and sticking to it!) for a few minutes per side and then brushing with a balsamic glaze, most likely using some store-bought balsamic cream (Pastene) that I have on hand, dressed up with a bit of  lemon juice and olive oil.

As to the broccoli – Steve and I like it well-steamed rather than the “healthier” more crisp style.  Actually, there are arguments for both sides: the more cooked, the more accessible many of the nutrients, albeit more cooking will reduce the amount of the heat-sensitive Vitamin C,  for example. But, in any case, here is a great way to keep broccoli crisp in your fridge, as well as perk up broccoli that was not quite as firm as one would like when purchased.

Just pop the broccoli in water and then pop into the fridge.

Just pop the broccoli in water and then pop into the fridge.

But, back to the rice.  I like using brown/whole grain rice for the added fiber.  I know there are issues these days with arsenic in rice and the whole grain version having more, but from my research, it looks like this is an issue with rice grown on former cotton fields on which arsenic-containing pesticides were used.  My solution is to buy my rice from the California-based Lundberg Family Farms.

ANYWAY – since the rest of the meal is quite simple, I thought I would make the rice more interesting.  And, truthfully, it does not take that much effort. Here is what I did:

Start with sauting onion until soft, and then add diced carrot and chopped fresh parsley.

Start with sauteing in olive oil to build a flavor base.

I started with sauteing a half a small onion until soft, and then added diced carrot, chopped fresh parsley, and freshly ground black pepper. I also tossed in a few dried red pepper flakes for fun.

Add rice and saute some more!

Add rice and saute some more!

Next, I added the rice (I used 1 cup) and sauteed until just a bit toasty – a few minutes while stirring.

I then added 2 cups liquid. I recommend using chicken broth or bouillon or other savory-flavored liquid, if available.  I make chicken stock and keep it in one-cup containers in the freezer.  Today I defrosted a cup of chicken stock and added water to make two cups liquid to the one cup of rice.

Add water and simmer on low for 45 minutes or more as needed.

Add water and simmer on low for 45 minutes or more as needed.

I am blessed to have a stovetop with a “simmer”  burner, so keeping the rice on a low simmer is easy for me.  When I have to use another burner, I watch the rice carefully and/or use a heat diffuser.  But, even at a more active simmer, rice comes out nicely after about 45 minutes. Just keep an eye out so it doesn’t dry out too much.  Although, if you get a bit of burning on the bottom, it can add to the complexity of the flavor and texture once you stir the rice up and serve.  🙂

All done and has passed the "quality control" tasting.  Yum!

All done – and  it has passed the “quality control” tasting. Yum!

And, there you have it.  For a one-pot meal, you can add shredded meat, tofu, tempeh, fish… ooo, salmon would be good!…or whatever strikes your fancy.  BUT, do remember that you can always make rice more interesting with just a little effort.

Enjoy!

Perfect last-minute dip recipe! Quick, Tasty, AND Healthy!

In a matter of minutes, I made a really tasty dip with ingredients I always have on hand – canned beans, garlic, plain yogurt, lemon juice, cumin, olive oil, salt, pepper, and fresh parsley, this last ingredient being for optional garnishing.

Given I am writing this on the day before Christmas, I am thinking that there might be some folks out there panicking because they don’t know what to bring as a potluck offering to a family gathering or other sort of holiday get-together. WELL, look no further.  🙂

You can see the original recipe on Allrecipes.com (one of my favorite recipe sites) by clicking HERE.

And, here is my interpretation, which doubles the recipe, replaces curry powder with cumin, and has a few minor adjustments of the amounts of some ingredients upon the suggestions of some of the recipe reviews on the Allrecipes site.

Image

Black Bean and Garbanzo Bean Dip

Black Bean and Garbanzo Bean Dip

Ingredients:
1 14 or 15.5 oz can black beans, drained
1 14 or 15.5 can garbanzo beans (chickpeas), drained
1 tablespoon olive oil
4 tablespoons lemon juice, freshly squeezed high recommended
2 tablespoons plain nonfat yogurt
2 tablespoons water
2 cloves garlic, roughly chopped
1 1/2 teaspoons cumin powder
salt and pepper to taste
fresh parsley sprigs (optional)

Directions:
Place black beans, garbanzo beans, olive oil, lemon juice, yogurt, water, and garlic into the bowl of a food processor or blender. Season with the cumin powder, salt, and pepper. Cover and puree until smooth. Refrigerate until ready to serve. Garnish with parsley sprigs, if desired.

While perhaps not the most attractive looking dip (as you can see, a sprig or two of parsley can help with that), it has a wonderfully bright and light yet satisfying flavor and a nice texture.  And, with no tahini and little oil, it provides a healthier option than much of the standard holiday fare.

I am thinking I might try adding a 1/4 cup or so each of chopped fresh parsley and grated carrot to the mix next time to further boost the healthy factor.  But, as is, it is already a winner in my book — and my kitchen!

Delightful Summer Chowder!

Oh. My. God.  Or OMG for short.  🙂  However and whatever the exclamatory phrase, the chowder I made last night was totally amazingly delicious!

The impetus was about a cup each, give or take, of lobster meat and shelled but not yet chopped steamed clams and 6 cups of clam broth left over from a lobster and steamer feast in honor of (and held a few days earlier than) Steve’s birthday.

I went online and perused various clam, seafood, and corn chowder recipes and then decided to just wing it, using the basic steps as a guide.  In particular, I wanted to use the squash blossoms, kohlrabi, and Asian greens in my fridge and sensed that these ingredients would work well together.  I was right.  <grin>

the veggies in the raw

Green onion (bulbs were used for another recipe) carrots, Asian basil, Asian spinach, squash blossoms, kohlrabi, and corn. Missing are celery,fresh parsley and potatoes.

Here are the ingredients I used for this recipe:

  • 2 tablespoons butter
  • 2 cups chopped green onion  – top of white and part green (no bulb)
  • 1 stalk celery, chopped or diced
  • 1 cup diced carrot (2 medium/small)
  • 1 ½ cups thinly sliced/chopped peeled kohlrabi*
  • 1 ½ cup corn kernels
  • squash blossom bulbs (see photos, below)**
  • ½ tsp dried marjoram
  • 2 tbsp chopped parsley
  • 1/3 cup tight packed chopped Asian basil
  • 6 cups clam broth
  • 10 oz small sliced potato (2 cups)
  • 1 cup half & half
  • 1 tsp ground black pepper
  • 1 cup chopped lobster
  • 1/2 cup chopped clams
  • 12 squash blossoms, torn – stamen removed (bulb added above)**
  • 1-2 oz Asian spinach,  torn

** How to prepare squash blossoms:

blossom with stamen
Squash blossom with stamen still intact. Note: for some recipes, you should leave the blossom intact when removing the stamen.
Stamen removed
Before tearing each blossom into 3 or so pieces, removed the bulb at the bottom and add the bulbs to the soup in with the kohlrabi and corn.

Melt the butter over medium heat in a heavy-bottomed pot and saute the onions, celery and carrots for a few minutes.  Stir in the kohlrabi slices*, corn kernels, and blossom bulbs, then add the marjoram, parsley, and Asian basil.

Before the broth is added.

Before the broth is added.

  • *A note about the kohlrabi:  This is my first time cooking with kohlrabi and, even as I write this, I have yet to look up how to prepare them.  Since it seemed to me that the outer part seems it could be a bit tough, I trimmed off the outside before slicing up.  But, I’d do as you prefer as to the outer skin on or off.

Next, stir and cook the veggies for few more minutes, then add the clam broth and bring to a strong simmer.  Add the potato slices, half & half, and black pepper.

potatoes

Just the potatoes. I had a few leftover small red and yellow ones, so I used them up!

Let the chowder simmer on low for about 10 minutes to cook the potatoes and further meld flavors.  Just FYI – it was delicious even at this stage!  This would be fine to serve as is or with just additional veggies.

Once the potatoes are cooked through,  add the chopped lobster and clams.  A Note about chopping the clams.  First, they sure are NOT pretty!

chopped clam

Be sure not to cut through the belly! The rest of each clam can be chopped into as big or small pieces as desired.

Stir the chowder and let sit on very low for 5-10 minutes to do more of that flavor melding, then bring to almost a simmer and stir in the squash blossoms and Asian spinach.

Asian spinach, just rinsed, but before being torn.

Adding the blossoms and greens.

To end, let the chowder sit for 5 or so minutes over very low heat to wilt the spinach and blossoms, then serve and enjoy!

Ready to serve!

This was truly a wonderful chowder!  I served it with some multigrain bread and it made for quite the satisfying meal. And, that lobster and clam feast was the gift that kept on going, since we had this chowder on Steve’s actual birthday. 🙂

I bet you could use this recipe as a basis for a vegetarian corn and potato chowder. I would use a corn-based vegetable stock (just make it yourself by simmering leftover corn cobs, carrots, parsley and celery, etc.), unsweetened soy milk, saute with oil, and leave out the seafood.  What made this chowder so special was, I think, the combination of a light touch of marjoram and basil, the Asian spinach and, especially, the unique flavor of the squash blossoms.  You might also want to add something else – a touch of flour to thicken and maybe use part almond milk to give a touch of a buttery flavor…  Hmmm…..You know, some chunks of nicely ripe heirloom tomatoes would be a nice touch, too.

For those who eat dairy and seafood, feel free to ad lib with other veggies and seafoods!  As I pointed out to Steve when when I told him I was not going to use a specific recipe, I suspect all soups, stews, and chowders originated as a way to either use up or stretch what was on hand, with the fancy recipes and techniques coming later.

In any case – just have fun.  A little thought about how flavors might go together and some experimenting might result in the next favorite family, or even famous, recipe.

Oh, I of course must mention that the Asian basil, Asian spinach, green onions, and squash blossoms were from Flats Mentor Farm, the kohlrabi from Farmer Dave, and the corn from Kelly’s Farm – all available at the Wakefield Farmers Market.  Shop local and most important: Support your local farmers!

Roasted Chicken Quarters with Fennel, Green Onions, and Potatoes

Last Saturday, I could not resist getting a just-picked fennel bulb from Farmer Dave and some lovely big green onions from Flats Mentor Farm.  And, the week before, I had picked up a pack of two big chicken leg quarters from John Crow Farm and had finally remembered to defrost them. (Their meats/poultry come frozen, as do most meats and poultry offered by farmers at farmers markets, at least in the Boston area.)

Green onions and a fennel bulb, pre-trimmed.

I also had some potatoes on hand (organically grown but sadly, not local) and decided to create a meal based on a combination of of a sausage/fennel dish that Steve and I really enjoy and one of our favorite chicken quarter recipes.

This was a really easy meal to prepare.  All I did was peel (optional) and chunk a few potatoes, trim and thick-slice the fennel bulb, and trim the stems and ends from the green onions, then season them with chopped fresh rosemary (dried is fine, too) kosher salt, and freshly ground pepper, drizzle with olive oil, and lightly toss, all right in the roasting pan.

seasoned veggies and ready to add chicken

Veggies ready – now to rub and add the chicken!

Next, I prepared  a variation of the paste/rub from my other chicken quarter recipe, combining a minced garlic clove, chopped rosemary, kosher salt, freshly ground pepper, and a touch of cumin.  Onto the chicken it went (this is a hands-on operation!) as I nestled the chicken into the veggies.  Oh, I also added a bit over a 1/2 cup of chicken stock before putting into an oven preheated to 425 degrees.

Ready for the oven

Ready for the oven!

50 minutes later it was perfect, although I did opt to remove the chicken quarters to a small tray and pop them under the broiler for just a few minutes to further crisp up the skin.  I also  drained out the remaining liquid into a small saucepan and added some cornstarch to thicken just a bit before adding back to the veggies, but, while it added a smoothness, it is not necessary to the success of the recipe. Neither is the extra browning, for that matter, but to each his or her own taste or time available.  🙂

This was a really delightful meal, made all the better by the chicken having being raised right here in Massachusetts on a farm that raises its animals in a responsible and healthy manner.

It was so good that Steve and I dug right in before I remembered to take a picture of it plated for this blog.  In fact, I did not remember until the next morning, but you can get the picture (forgive the pun) from this lovely re-creation:

plated

Plated, albeit cold leftovers from the fridge. It still looks (and IS) delicious!

And, that’s it for now.  🙂

Grilled Shrimp and Scallops on a Bed of Arugula and Sliced Peaches

It always amazes me how just a few ingredients can come together and create an amazing bouquet of flavor.  And it is especially fun when it happens due to a “what I have on hand” situation. This particular meal got its start by The Fish Lady (Globe Fish at the Wakefield Farmers Market) having only 1/2 pound of shrimp left by the time I stopped by to shop, so, along with the shrimp, I got 1/2 pound scallops.

The week before, I found and used a really lovely marinade for shrimp to be grilled in their shell.  By the way, grilling in the shell does make for some great flavor!  But this week, I figured I’d peel the shrimp since it would be grilled with the scallops and, as much as I love the flavor of shrimp and scallop on their own, I thought this would be a good time to try adding a bit stronger flavor.

As usual, the Internet came to the rescue with a great glaze recipe that conveniently called for the exact 1/2 pound each of shrimp and scallops that I had purchased. I followed it exactly except for substituting lemon juice and zest for the lime because I didn’t feel like going to Farmland for just a lime!

On the grill before the glaze. I think we’ll forgo the skewers next time!  🙂

Grilled Shrimp and Scallops With Lime-Ginger Glaze

  • 1/2 pound fresh shrimp (de-shelled and de-veined)
  • 1/2 pound fresh scallops
  • 2 tablespoons soy sauce
  • 1/4 cup (about 2 limes) fresh lime juice *
  • Zest from 1/2 lime *
  • 3 tablespoons honey
  • 2 inch piece of fresh ginger
  • skewers
  1. Peel the fresh ginger by scraping it with the edge of a spoon and then grate or mince.  I like to grate the ginger using a micro-planer.  We need about 1 tablespoon of finely minced ginger.
  2.     Mix the honey, soy, ginger, lime juice and zest in a small sauce pan and bring to a simmer.
  3.     Simmer the lime, soy and ginger under low heat for about 10 minutes to reduce to a glaze.
  4.     Preheat the grill to high heat and clean and oil the grates (important to lube up the grates, we don’t want to have to pry off one of those beautiful shellfish!).
  5.     Skewer the shrimp and scallops.
  6.     Place the shrimp and scallop skewers over high heat and grill with the lid open for about 2 or 3 minutes.
  7.     Flip the skewers over to the other side and baste the shrimp and scallops with the soy, lime and ginger glaze.
  8.     Grill for another 3 minutes on the other side and then flip the skewers over.
  9.     Brush the other side with the glaze and then remove the skewers from the grill.  We just want to hit the other side with the glaze, but don’t let them grill too long on the “glazed” side or the honey will burn.

* On the advice I found online, I added just a bit more lemon juice and zest than the amount of lime called for in the recipe and it worked beautifully.  However, I intend to try this with the lime next time to get the full effect.  🙂

Once I determined the flavoring for the seafood, I realized that my original plan of using some just picked tomatoes (from Farmer Dave at our farmers market) would not work, although I was determined to use some of the wonderful arugula I had also gotten at our market that morning from Flats Mentor Farm.

I knew I needed sweet and a bit of tang to go with the glaze and had an AHA! moment when my eyes lit upon the fresh, peaches at perfect ripeness I has also gotten from Farmer Dave that morning.arugula and peach salad

While the glaze was simmering, I rinsed and spun dry the arugula, sliced up some peaches, and put them together, adding a very light sprinkling of lemon juice, rice vinegar, and some freshly ground black pepper.  I meant to add some olive oil but – oh well!  Maybe next time.  <grin> Actually, now that I think of it, olive oil would be too strong a flavor.  Perhaps some canola oil would be nice.

the meal, plated

Plated, fresh off the grill.

Once the seafood was off the grill, I put some salad on our plates and topped with the shrimp and scallops.

To really top it off, while preparing the meal I had just happened to have a glass of Three Sisters White Wine from Charlton Orchards that I had purchased at the market the week before …I t was the PERFECT beverage to accompany!

This was truly an exquisite meal, light but satisfying, perfect for a hot summer evening. And so easy! It just doesn’t get much better than this!

Three Sisters White Wine completed the experience!

Kitchen Tip – great little knife sharpener!

Just a quick tip, here.  I have read all kinds of reviews on knife sharpeners and I am sure that, if one has knives worth hundreds of dollars, it may very well be worth investing in a top-of-the-line knife sharpener.  But, you know what works just fine for me?  A little Rada sharpener that cost a few bucks.

Check out how cleanly these tomatoes are sliced!

I also have a Rada Chef knife that I love that I purchased for $12 at a church fair.  It is on the light side, so I prefer another knife for some jobs such as mincing, but it is great for for slicing, chopping, and carving.  By the way, that is my other favorite knife in the photo.  Check this link to see the Rada chef knife:

https://www.radacutlery.com/Content/Images/large/R131.jpg

There – must get back to other things, but I have just sharpened the knife to slice the tomatoes and figured I’d take a quick picture and create a short post while I was thinking of it.  🙂

Skillet Tamale Pie: Great as is, but with endless possibilities!

I was on the Cook’s Illustrated website looking for equipment reviews of skillets and this recipe for Skillet Tamale Pie came up in the process.  Since I am always looking for meals that are quick to prepare and hold well on warm in the oven, I made sure to put this on my “Try soon” list.  And try it soon I did.  🙂

tamale pie

Back for seconds already!

For a change, I followed the recipe exactly as written except for using whole-wheat flour instead of all-purpose (refined/white) flour since, as happens most of the time, I had no white flour on hand.

To access the recipe on the America’s Test Kitchen Cook’s Illustrated site, you need to be a subscriber, but I’ll copy it here with the understanding that this is a sample to encourage you to become a subscriber yourself. 🙂 While I am copying things, (hopefully within fair-use limits!) I am going to be lazy also repeat the instructions verbatim.  The picture are really mine, though.  <grin>

Tamale Filling

  • 2 tablespoons vegetable oil
  • 1 medium onion , minced
  • 2 tablespoons chili powder
  • 1/2teaspoon salt
  • 2 medium cloves garlic , minced or pressed through a garlic press (about 2 teaspoons)
  • 1 pound ground sirloin (lean)
  • 1 (15.5-ounce) can black beans , drained and rinsed
  • 1 can (14 1/2 ounces) diced tomatoes , drained
  • 3 ounces cheddar cheese , shredded (1 cup)
  • 2 tablespoons minced fresh cilantro leaves
  • Ground black pepper

Cornbread Topping

  • 3/4cup unbleached all-purpose flour (3 3/4 ounces)
  • 3/4 cup yellow cornmeal (3 3/4 ounces)
  •  3tablespoons sugar
  • 3/4 teaspoon baking powder
  • 3/4 teaspoon baking soda
  • 3/4 teaspoon salt
  • 3/4 cup buttermilk
  • 1 large egg
  • 3 tablespoons unsalted butter, melted and cooled

Adjust an oven rack to the middle position and heat the oven to 450 degrees.
For the tamale filling: Heat the oil in a 12-inch skillet over medium heat until shimmering. Add the onion, chili powder, and 1/2 teaspoon salt and cook until the onion is softened, about 5 minutes. Stir in the garlic and cook until fragrant, about 30 seconds.

Stir in the ground sirloin, beans, and tomatoes, and bring to a simmer, breaking up the meat with a wooden spoon, about 5 minutes.

Stir the cheddar and cilantro into the filling and season with salt and pepper to taste.

For the cornbread topping: Meanwhile, whisk the flour, cornmeal, sugar, baking powder, baking soda, and salt together in a large bowl. In a separate bowl, whisk the buttermilk and egg together. Stir the buttermilk mixture into the flour mixture until uniform. Stir in the butter until just combined.
One more caveat from the original recipe – I used an instant buttermilk powered that you keep in the fridge, so I mixed the powder with the dry ingredients and mixed  just the water to reconstitute with the egg.

Close up to show texture and consistency

Dollop the cornbread batter evenly over the filling and spread into an even layer. Bake until the cornbread is cooked through in the center, 10 to 15 minutes. Serve.

Dolloped and ready for the oven

Done!

One more caveat from the original recipe – I used an instant buttermilk powered that you keep in the fridge, so I mixed the powder with the dry ingredients and mixed  just the water to reconstitute with the egg.

This dish is truly a winner! Not only was it really tasty, it was really easy to make. And, even better, it lends itself to all sorts of variations.  Instead of the ground beef, you can use any kind of ground meat or poultry, cube or shred pultry, beef, or pork, use up leftover cook meats, or go vegetarian with more beans, tofu, or lots of extra vegetables.  And, with meat or not, you can add  or substitute corn, green beens, bell pepper, or whatever other veggies strike your fancy.

And, I suppose, you could have a topping of tortillas or corn chips and cheese rather than the corn bread, but that would be vering off into a different, albeit also tasty recipe.

One last point in favor of this dish is that this holds well in the oven on warm, so if you are not sure of the dinner hour, you can make it early and it will be ready when you are. BUT, if you do that, beware of the hot handle on the fry pan and be sure to take precautions if your memory is anything like mine.

And leave that potholder on there!

Enjoy…safely.  <grin>